Selecting The Correct Hardwood Flooring

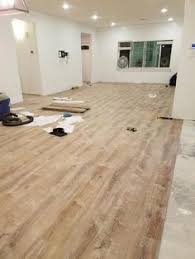
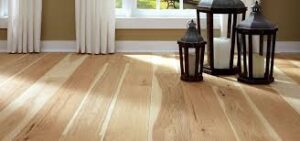
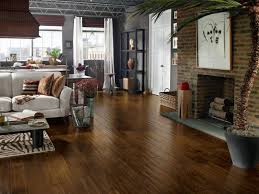
How To Clean Engineered Wood Floors

Keep your Engineered Wood Floor smudge and dirt free with this handy guide from the experts. For floors that add immediate warmth to a room without compromising on character, engineered floors are high quality, durable and incredibly easy to clean. Not to be confused with laminate flooring, engineered wood floors are the flooring type for the future: they sport the look and feel of real hardwood, without the disadvantages of cost and restrictions of placement. Engineered wood flooring is made up of a combination of laminate and hardwood, formed of a series of high-density layered fibres. This layering technology gives these floors greater support, meaning that they can tolerate greater fluctuations in temperature and moisture levels. Whether you’ve already taken the plunge, or are just browsing, if you’re are worried about how to maintain your new engineered wood floors, let us put your mind at ease. To keep your wood floors looking like when they were first installed, all you need to do is follow a few simple steps: mop up spills immediately, stick to a regular cleaning schedule and use the right cleaning agents. Go for easily maintained, stress-free engineered wood flooring – one of the many reasons why engineered floors are one of our most popular floor types. Read on to find out how to leave your floors spotlessly clean.

THE BENEFITS

There are numerous benefits to installing engineered wood flooring as opposed to solid hardwood floors, lower cost being a significant one. Engineered wood floors are incredibly budget-friendly, and come in a variety of colours, finishes and board sizes. This means that you often have more options than if you chose a solid hardwood floor type. Engineered flooring is extremely long-lasting, made from multiple solid layers that give the floorboards the strength and finish of solid hardwood. These floors can also be re-sanded up to two or three times, and then re-varnished or lacquered, to remove signs of unsightly stains and scrapes. Engineered flooring has come a long way in the last few years – many people cannot tell the difference between solid and engineered wood. Engineered wood floors look just as good as authentic wood, without the costly disadvantages. This floor type can be laid down more easily, even as a beginner DIY project, and can be placed in bathrooms, kitchens and with underfloor heating as it doesn’t expand or contract. This is an affordable, durable, maintenance-friendly wood floor that will suit every home.

PREVENTING MOISTURE

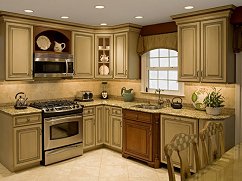
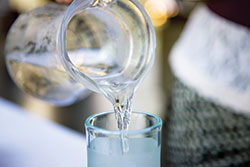
One of the most common problems associated with wood flooring is moisture. Because wood is a natural material, it expands and contracts in response to levels of moisture in the air. This can lead to unsightly cracks and blemishes in the wood, and even buckling in some cases. While engineered wood flooring does not carry the same risk as solid wood, it still sports a hardwood upper and so care must be taken when it comes to maintenance. If you’re particularly concerned about the problems that high moisture levels can cause – for example, you’re placing new floors in a moisture-rich environment, such as an under-ventilated bathroom or basement – you might consider taking moisture readings of your subfloor for peace of mind. Another easy tip is to leave the planks of wood in the room where they will be laid down so that they acclimatise to the environment, reducing the risk of damage. Prevent stains by watching out for spills. While engineered floors may be laid down in kitchens and bathrooms, it’s important to clean up all spills quickly, particularly when they develop into puddles of standing water. This is even more important for chemical spills, which can cause irreversible staining and damage if not mopped up quickly before they have dried.

REGULAR MAINTENANCE

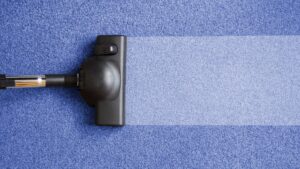
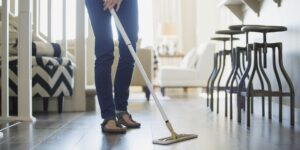
Keep your floors looking as good as new by implementing a consistent cleaning routine. Sweep floors three or more times a week to remove debris and prevent scratches. Always sweep your wood floors before you mop for ultimate cleaning. Try to properly mop your floors at least once a week. Some experts recommend using a microfibre mop on engineered wood floors to stay ultra-gentle, but using a regular mop is also fine, as long as it remains damp and not soaking wet. Add a few drops of specialised engineered wood floor cleaner to water and submerge your mop, making sure to wring out as much water as possible before you begin. For very hard-to-remove stains, try mixing white vinegar and hot water in limited amounts – though always check with your manufacturer beforehand. It is also possible to carefully vacuum your new wood floors without causing damage. Just make sure that your vacuum is lightweight, with a hardwood-mode or recallable harsh bristle bar that may cause scratches.


Know Before You Begin

Hardwood’s arch nemesis is moisture, especially standing liquid that’s allowed to absorb below the surface. This can cause the floor to expand, warp and cup. This should always be your primary consideration when cleaning hardwood. Always wipe up spills immediately and don’t allow liquid to pool. Additionally, you should avoid putting any product on your floor that contains ammonia, wax, solvents, bleach, detergents, polishes or vinegar. Never use steel wool, stiff cleaning brushes or steam cleaners on hardwood.

Tools and Cleaners

Check with the flooring manufacturer before selecting a cleaner, but Bona floor cleaners, made specifically for hardwood, are often a great option. You’ll need a gentle hardwood floor cleaner, a microfiber mop and a vacuum.


DO:

  • Use walk-off rugs at doorways to help prevent dirt, grit, and other debris which can get tracked in and scratch the floor.
  • Immediately wipe up any spills with a slightly dampened cloth. You may want to place an area rug near kitchen sinks to avoid water on the floor.
  • Use a wood-cleaning product to remove dirt and oil buildup. If the wax finish on your wood floor is discolored or has a heavy dirt build-up, use a combination liquid cleaner/wax specifically made for wood floors.
  • Follow the instructions on the bottle to avoid damaging the surface.
  • Avoid wax buildup under furniture and other low traffic areas by applying wax in these spots only every other waxing session.
  • Put stick-on felt protectors under the legs of furniture to prevent scuffing and scratching. Replace these often as dirt and debris embedded in the pads act like sand paper on the floor surface.
  • Use a humidifier to minimize gaps during the winter months when you are running heating throughout your home.
  • Use blinds or curtains year-round to prevent harmful UV rays from discoloring your floors.

DON’T:

  • Do not use vinyl or tile cleaning products on wood floors. Similarly, never use self-polishing acrylic waxes on wood floors.
  • Do not wet-mop or steam mop your wood floors. For wood flooring in the kitchen, place an area rug at the kitchen sink.
  • Do not over-wax a wood floor. If a waxed floor dulls, try buffing instead. If buffing no longer restores shine, you may need to rewax. If so, apply a cleaner and liquid wax specifically for wood floors. Apply the wax evenly, allow the floor to dry, and buff to the desired luster.
  • To avoid scratches when moving heavy furniture or other objects, do not slide it on wood flooring.

For polyurethane finished floors

  • Dustmop, sweep, or vacuum regularly.
  • When cleaning no longer restores shine, recoat the floor with a surface finish. The frequency of recoating depends on the amount of traffic.
  • Never wax a surface-finished floor.


Solid Wood Floor Maintenance

General recommendations:

1) Keep the temperature and humidity conditions in the room:

  • Humidity: 45-55%;
  • Temperature: 18-22 degrees Celsius.
  • In case of low humidity (during the heating season), the room should be equipped with a humidifier,
  • In case of high temperature (in the summer-autumn season) the room should be equipped with air conditioning or a dehumidifier.

2) It is important to avoid aggressive mechanical impact on solid wood floors:

  • It is necessary to exclude mechanical impact: sharp supports of furniture, footwear, abrasives.
  • It is recommended to furnish the legs of the furniture with special overlays of felted cloth or fabric, and under the furniture on rollers you should put special mats.
  • If you notice sand, dust, or traces of dirt on the floor, try to remove them immediately with a soft brush or vacuum cleaner, otherwise they may cause scratches.
  • When working with a vacuum cleaner, use a soft nozzle.
  • Do not use washing vacuum cleaners or robotic vacuum cleaners.

3) The renewal and colour restoration of the oil-coated flooring is made only with the use of coloured oils identical to the original colour of the design.

4) It is unacceptable to use any detergents for cleaning floors, other than those recommended by the manufacturer.

5) Wet cleaning should only be done with a well-wrung cotton cloth.


PREVENTATIVE CARE

Cleaning Dirt & Grit

To avoid dents, vacuum with a brush attachment — don’t use vacuums with beater bars. Dirt, grit and sand are your hardwood floor’s worst enemies. They act like sandpaper on the finish, causing scratches, dents and dulling. Place floor mats at entrances and high traffic areas to trap dirt and prevent damage.

Water & Spills

Standing water can warp hardwood floors and can damage the finish. Simply wipe up all spills as soon as they happen.

Hard Cleaners

Avoid oil soaps as they can build up leaving a film creating a dull look to your floors. Instead, neutral pH cleaners developed specifically for wood floors are recommended.

Furniture

Lift the furniture to move it — avoid dragging. Felt contacts under the legs will help prevent scratches.

Sunshine

Direct sun can discolour your hardwood floor.  Close curtains and blinds or add sheer drapes to protect your floor from the intense UV rays of the sun.

The MPV Award As It Relates To Wedding Videos And Event Videographer

Reasons To Hire A Corporate Videographer To Film Your Event

If your business has a big corporate event coming up now is the time to take the steps to ensure you capture the entire event on video. If you haven’t considered hiring a corporate event filming team, you’re certainly missing out on a lot of missed opportunity. Event video coverage is about more than just capturing the daily happenings on stage. This is a way for you to build awareness for your brand, keep people engaged and interested in your business, and share what’s happening at you company for many months after the big event. These are just a few of the major reasons that you should consider hiring a corporate videographer to film your corporate event.

  1. Professional Footage Reflects The Quality Of Your Business

You wouldn’t produce a sloppy graphic to share on social media or on your website would you? The same is true when it comes to capturing your event on video–only the best footage will do! A professional corporate event film crew has the skills to capture your main event with style and in a way that someone just starting out in the field or learning about video production simply wouldn’t be able to deliver.

You want your event to appear as professional as your business. You don’t want some random employee filming from their iPhone and calling it a day. Professional corporate event filming services show your customers and potential customers that you mean business.

  1. Professional Event Videographers Respect Your Space

Of course you want close ups of the keynote speakers and you want to capture all those intricate moments to the best of your ability, but Joe from IT isn’t going to capture all of that footage with the same demeanor that a professional would. Joe is going to be in the way and he’s probably going to make a lot of mistakes and his filming will be borderline intrusive to the speakers on your stage–you certainly don’t want Joe recording your event!

A professional videographer knows how to capture your corporate event eloquently and without interrupting the activities taking place. And, since there will be limited disruption, attendees and all those being filmed will act more natural because they won’t even realize the cameras are rolling in many cases.

  1. Professional Cinematographers Have Professional Editors Too

If you hire a corporate videographer then you can almost guarantee that your event footage will pass through a rigorous editing process in order to appropriately coordinate the footage of your event into a seamless production that is worthy of your desire to share it. However, if you hire Sally from HR to capture the highlights from her iPhone, chances are you’ll wind up with a bunch of half-captured moments in several files that will in no-way come together as a seamless rendition of your event. Is that what you want?

  1. Professional Video Shares Your Event Story

How do you capture the eyes of a vast audience and keep them engaged and ready for every last minute of your video? You tell a story! Professional event videographers realize the need to conceptualize the video footage that they capture so that it can all be edited in a way that allows the footage to tell the story of your event. Corporate videographers use emotion, connection and a creative approach to bring your event to life on camera. You want to share your story with the world don’t you?

  1. Professionals Follow Production Timelines

Finally, hiring a corporate videographer to capture your big event on camera is about getting the work finished in a timely manner. Professional videographers and event filming services realize that the sooner you have your footage back, the sooner you can put the film to work for your brand. Your video production team will have a production timeline that is laid out prior to your contract being signed and you’ll know exactly when to expect your finished footage to be prepared.

While you may have time to wait for the footage, think of how much opportunity is lost when you are waiting around for the final files instead of sharing them on social media, your website, and in your marketing and promotional materials. Hiring a professional videographer ensures delivery of your event video on time.


Three Different Types Of Videographers; Here’s How To Spot Them.

#1 The Novice

This is the new person who just bought a camera and a little bit of equipment. This person has a burning desire to be the best videographer and practice their craft, but doesn’t have the knowledge or the skills. He or she would be new to the business and may not have a show reel or other work they can show you. Although some of these people are stars in the making, you may not have the time to shoot your footage twice or be able to deal with the mistakes. To make sure you’re not dealing with a novice, ask this key question: “Can I see your work?” If you don’t see at least 20 videos, this may be a Novice.

#2 The Videographer

This person has been around a while, and has made some mistakes. You can feel lucky that the mistakes have been made on other people’s projects, and the chances of this person making a mistake on your project is pretty remote. This person has been in the business for at least five years, has seen many different scenarios, and isn’t afraid to speak up when they see something wrong. Videographers are comfortable talking about their work and are not afraid to show it. Their key skills in composition, depth of field, and location selection are second nature to them. The key to hiring this individual is finding the one who may not know his or her value yet. There are many of these folks out there—you just have to do some hunting to find them.

#3 The Cinematographer/Director

The Cinematographer has all of the skills listed above. The Cinematographer is the type of person who isn’t afraid to engage you about your message or story and really dig into your product and audience. This person wants to give you direction and will pay attention to details including what you are wearing, background, foreground, and anything that may mess up the shot. The Cinematographer is worried that you may make the final product look bad based on poor customer choices. This person will have a portfolio that will take you days to get through, and you should see at least two different genres of work. The Cinematographer/Director is worth the price if you have the budget. This is the person who may save you money by creating a video that converts pedestrians into customers.


Essential Qualities of a Good Videographer

  • Having Great Communication Skills

A good videographer will have great communication skills and be a leader both on and off the set. When filming a project, having a good line of communication is a must. A breakdown in this communication leads to issues behind the camera. A videographer who has great communication skills will be able to not only communicate with anyone helping them, but they will also be able to communicate clearly with their client to ensure that both parties are on the same page. If a videographer is not sure about what their client wants, they should always inquire before moving forward with the project.

  • Having Knowledge of All Types of Video Equipment

There are a large variety of video cameras, editing software, lighting rigs, etc. A good videographer will have basic knowledge of how all these pieces of equipment work, especially if they are going solo on a project. Having access to mid to upper range equipment is also a must. They will also have knowledge of basic lighting setups, white-balance levels, and camera movement. All these elements (and many others) put together will help create a great final cut.

  • Being Able to Adapt to Any Situation

Being a videographer also means that you have to adapt to what is happening around you, especially if you are filming a live event where you only get one chance to get it right. Everything doesn’t always go according to plan, and you have to able to adjust for that. Quick thinking and fast-acting are the difference between a perfect shot and a missed opportunity.


Videographer Skills and Qualifications

Videographers have a good eye for detail and beauty. They use their skills to tell visual stories with video and audio recorded during various events. Employers and individuals who hire videographers seek out professionals who have the following specific skills:

  • Computer skills – videographers need good computer skills to work with various video editing software programs, such as Adobe, Cinema 4D, and Photoshop
  • Interpersonal skills – videographers use excellent interpersonal skills to work with people of all ages from all walks of life, helping them feel relaxed and comfortable in front of the camera
  • Time management – videographers use time management skills to work within tight deadlines, capturing action and once-in-a-lifetime moments on camera
  • Multitasking – because videographers capture many different moments, people, and expressions on camera, employers look for professionals with multitasking skills to fill this role
  • Communication skills – videographers provide direction to capture the right moments on camera, which requires good verbal communication skills
  • Physical fitness – it takes physical fitness for videographers to transport, move, set up, and take down various pieces of heavy recording equipment
  • Attention to detail – videographers use keen attention to detail to make precise edits to captured video and stage beautiful scenes for filming purposes


A simple video assignment for the interview process

What videographer interview would be complete without actually seeing what the candidate is capable of?

hat’s where the practical video assignment comes in. By this point, your candidate has probably ‘talked the talk’ during the interview process but now let’s see if they can ‘walk the walk’ by actually creating a video.

This assignment not only shows you the candidate’s video skills, it will also tell you a lot about their time management, creativity, critical thinking and communication skills.

Here’s what you should ask them to do:

  • Have your videographer candidates make a video explaining why they want the job. This will give you an idea of how good they are at telling a story. Also, how they present themselves could give you an idea of how well they understand your brand.
  • Give a certain timeframe to complete the video (2-5 days). This shows how well they do under a time constraint, how fast they are able to turnaround content, and how creative they can be under pressure.
  • Have them develop a script or storyboard to accompany the video. This shows their creative process beyond the cameras and lights. Many times this is what they’ll be presenting when they start a new project. How prepared can they be?
  • Allow them to be creative, and think outside the scope of a Traditional Marketing video. Let them know that they are free to tell the story as they wish to tell it, so be creative and have fun with it.

Once you’ve received their video, use the criteria from earlier in this article to gauge their skill levels, personality, and creativity.

Did they do the bare minimum or go above and beyond? Did they seem to struggle to complete the task or did they push their boundaries?

The Education And Roles Of An Commercial Electrical Remodel Contractor

COMMERCIAL ELECTRICAL RENOVATION

Are you planning to renovate your workplace? Do you need to expand your operations? Maybe you have changed your business model or recognize that it’s time to renovate that client waiting room. Be mindful of your electrical needs. We can help with electrical wiring and maintenance to your existing commercial workplace.

Commercial Electrical Upgrades

Business and telecommunications technologies updates are constantly progressing. Therefore, these upgrades often require reconfiguring your networking electrical cabling. To ensure maximum work efficiency, it’s important that as a business owner, you are keeping up with those updates. We can upgrade your business’ electrical service and infrastructure to greatly improve your connectivity and efficiency.

Commercial Retrofits

Sometimes, commercial retrofitting is a good option for an older commercial building to go through to bring that building back to code

Phone and data wiring

When it comes to phone and network installation, it seems as simple as plugging in a CAT6 cable into a modem and run it across the office. Also, it may seem as easy as taking telephone cables and running them across the office.

Office managers often overlook the differences in the types of cables. Since internet and telephone systems are different, proper installation requires different methods. Therefore, let your office manager take care of your office personnel and let the electricians take care of your wiring. We provide wiring and installation services for network cable, ethernet wiring, telephone systems, audio & visual needs and much more.

New electrical circuit installation

While single-phase electrical panels are sufficient to power residential homes, commercial buildings require more. This is because commercial needs are more demanding due to items such as large air conditioning units, large appliances, multiple computers, and even industrial machinery. As a result, commercial buildings often require 3 phase electrical panels installed by experienced commercial electrical contractors.


Electrical Upgrades to Consider During a Commercial Renovation

Renovations are a necessary evil most businesses have to go through eventually. If your business is growing, your building and its capabilities have to grow with it. Ideally, you’ll include enough innovation in your upgrade to keep from having to repeat the process for a number of years. The best upgrades include innovations aimed toward the future as well as needed improvements for today.

Before you finalize your plans, be sure to discuss these (and any other) changes that you want made in your commercial electric power and lighting.

Large Kitchen Appliances

When changing a building’s use from commercial sales to food service, wiring for large kitchen appliances is almost certainly necessary. If you’re adding a kitchen to any kind of commercial space, you’ll probably need three phase power, as well as additional outlets kitchen appliances such as ovens, deep fryers, and even walk-in freezers will use much more power than a typical retail space includes. Wire your kitchen area with more power outlets than you think you’ll need. If your business takes off, you don’t want to have to spend all that new profit on another upgrade in a couple of years.

Dedicated Circuits

If your business includes any kind of computer usage or computerized cash registers, your data and power usage is only going to increase as the years go on. Dedicated data circuits ensure that generalized power surges are less likely to damage electronic equipment than if they were all on one circuit with the rest of your equipment. Separate the areas of your business, including areas of high data usage, into a line of dedicated circuits that will help to ensure stable power quality all the time.

HVAC

Heating and air-conditioning are likely a big part of your power usage, and are likely to remain so in the future. The newer thermostats with timers and smart technology can pay for themselves in a surprisingly short amount of time. By changing the time and temperature the furnace and air conditioner work and coordinating it with your workday, you can save a substantial amount of money on your power bill. Have your electrical contractors update the wiring to the systems, as well as leaving space for future smart technology.


REMODELS & NEW CONSTRUCTION

The electrical infrastructure throughout your building is the foundation that keeps your business operating at peak performance.  From expanding current locations, to renovating current ones certified technicians ready to help you every step of the way.  As technology evolves, so does the electrical infrastructure needed to support a range of hardware and lighting.

Every renovation requires a thorough analysis to ensure all the additional additions to the building can be appropriately and safely powered have an array of electrical projects ranging from corporate offices, to warehouses, to small auditoriums, to stadiums.  Our team has everything you need to ensure every aspect of your project is achievable, on budget, and without the need for downtime.

ELECTRICAL NEW CONSTRUCTION EXPERTS

Every new construction project starts with designing an electrical plan capable of handling all the power needs for today and tomorrow’s technology.  We know technology is constantly advancing, which is why we help you understand what is necessary for today, as well as what is needed when preparing for upgrades in the future.  A perfect example of this would be considering smart commercial electrical services to increase efficiency.  Simply upgrading lighting and appliances can improve productivity and decrease power usage.

REMODEL AND NEW CONSTRUCTION SERVICES:

Fire Alarms & Security

Exterior Lighting

Energy-Efficient Lighting

LED Warehouse Lighting

Parking Lot Lighting

Security Lighting

Commercial Surge Protection

Power Supply Systems

Commercial Panels

Backup Generators

Smart Lighting & Access Control


Remodels/Upgrades/Floor Heat

Remodeling a commercial space is a hefty project that requires extensive work. However, as you adapt, improve, or expand a building, you must consider updating the electrical system as well. will ensure that we install an electrical system that is up to current local code and prepared to handle the demands of your remodeling project. We’ve been assisting general contractors and builders throughout the areasince 2013 and are dedicated to providing quality service each and every time. We are a business, and we understand the importance of limiting any downtime and preserving your bottom line, which is why we work closely with you to complete all your electrical remodeling requirements on time and on budget.

Commercial Electrical Remodeling Services

If the building that you’re remodeling suffers from frequently tripped breakers and other electrical problems, it could be because of faulty wiring. Our electricians can perform a thorough inspection to determine whether rewiring is necessary. If it is, we’ll rewire your entire building so that it is capable of handling the business’s electrical demands. During this time, we will also adapt new outlets and any other fixture installations, such as lights and ceiling fans, to the new wiring pattern. We will also disconnect and reconnect any machinery and can assist with all server room or IT needs.

When to Seek Out Commercial Electrical Upgrades

Even an expertly designed commercial electrical system would eventually need an upgrade to better handle the electrical demands of the building. Electrical upgrades are important because they improve the safety and functionality of a commercial or industrial space.

suggest getting commercial electrical upgrades when:

There doesn’t seem to be enough power for your daily activities and tasks

Your lights are constantly flickering or going out, especially when a large machine or appliance is turned on

Your equipment shuts off for no reason

You must run extension cords between circuits in an attempt to balance the load

Your breakers frequently trip when you try to run all your electrical devices at once

Your breakers fail and your equipment overheats

You notice your electrical panel or wiring contacts show signs of deterioration or corrosion

You notice melted wires or wiring insulation

You need surge protectors on every outlet

Even if you’re not experiencing any of these issues, it’s a good idea to consider an electrical system upgrade when you’re installing newer equipment so you can be sure it can handle the load. This is especially the case if you’re installing a new air conditioning unit or electric heating.


Electrical Remodeling Tricks, Tips, and Hacks

When it comes to minor electrical upgrades and remodeling projects, less is often more. That is, the less you can mess with the existing fixtures and wiring, the better. If something is unsafe or improperly wired, of course, you should replace it. But if you just need to add a light here, an outlet there, it can pay to look for ways to streamline the process. The following tips can help.

tend to think room by room, forgetting that an interior wall is nothing more than some framing and two layers of drywall (or plaster). Electrical wiring runs inside the walls and can be accessed from either side. So if you need to add an outlet (receptacle) to a room that has no nearby outlets, check the opposite side of the wall. If there’s an outlet (or a light switch) close by, you can cut a hole in the wall behind the outlet box to tap into the circuit. Just be sure you know what circuit you’re tapping into, and don’t exceed its safe load limit by adding a new outlet.

Sometimes ceiling lights aren’t where you want them to be. But you may find that you can move a ceiling light surprisingly far without adding more wire or running a new circuit. The electrical runs in your attic often have some room for movement. You can increase this by removing a few of the staples that secure the electrical cable to the framing. Be sure to re-fasten the cable with staples after you’ve moved the fixture.

non-permitted electrical work in residences isn’t uncommon. For small jobs, like adding an outlet, it’s likely that you don’t even need a permit to do the work. However, for more major electrical work, like adding new circuits or installing a subpanel, you most certainly will need a permit. And permits usually mean working with a licensed electrician.

However, in some areas, homeowners can legally do their own electrical work and get fully permitted and approved. The bar to this is a ​homeowner’s electrical exam. It’s not standard everywhere but is growing in use. A homeowner studies up for the test and pays a nominal fee. They then take a test consisting of 10 to 20 questions, usually at the permitting office. If you’re qualified to do the work yourself, you’ll save the cost of hiring a pro. If you’re not qualified, use an electrician.

Should You Hire A Dog Bite Lawyer

Q and A on Dog Bite Law

Who Is Legally Responsible When There is An Injury?

State leash and dog bite laws delegate responsibility to the owner to control their animal at all times. A dog that is allowed to run around without a leash may end up attacking a person that is nearby. The negligent owner is liable under these circumstances to take care of any pain, suffering, and medical expenses of the victim. If the dog is determined to be dangerous, the owner may face additional penalties that could include time in prison and significant fines.

Can I Collect Compensation?

Yes, victims are eligible to collect a settlement for pain, suffering, disfigurement, lost wages, and medical expenses once their case is evaluated by an attorney.

What If the Dog Belonged to a Neighbor or Friend?

These cases frequently involve attacks by dogs that the victim has become familiar with prior to the incident. It might be an awkward situation to have to take legal action against someone that you care about, but you will need to collect compensation for any medical treatment you require. If the neighbor/friend has insurance as a renter or homeowner then the claim should be filed against the insurance company rather than the actual dog owner.

What happens if the dog owner doesn’t have insurance?

If the dog owner does not have insurance, it is important to investigate whether they have assets or income sufficient to satisfy the damages caused by the dog bite.  Also, it is important to determine whether there are other responsible parties or available insurance polices such as renter’s insurance, a relative’s policy, or a commercial insurance policy.

Are dog owners required to post security signs around their property?

Dog owners are not required by law to post security or warning signs around their property.  However, it is makes good common sense to warn of danger especially powerful or aggressive dog breeds.

Should I press charges if my child has been attacked?

You should cooperate with local prosecutors if you or your child is attacked.  Often, dog owners are prosecuted for allowing a dog to be at large, unregistered, or keeping a vicious dog.

What compensation am I entitled to if a dog has bitten me?

Dog bite victims entitled to compensation for their damages.  In Arizona, a dog bite victim is entitled to be compensated for the nature and extent of their injury, pain, anxiety, suffering, cost of medical care, future medical care, lost wages, loss of earning capacity, and loss of consortium or companionship for a spouse or family member.  Specifically, in dog bite cases victims are often disfigured physically by scars that require plastic surgery.  Many dog bite victims are harmed by the emotional trauma of the event and fear of dogs.


What Should I do if I Have Been Attacked by an Animal?

The first thing a victim of an attack should do is always seek medical care for injuries. It is also important to get as much information as possible about the animal and its’ owner. If you are attacked by a wild animal or an animal that you cannot identify, your doctor may insist that you get protective rabies shots, a painful experience.

What Steps Must be Made to Make or Present a Claim for Injuries?

If you or a loved one has been bitten by a dog, a claim for damages can be made against the owner of the animal and his or her home insurance company. Be aware that the insurance company will likely try to convince you that you do not need an attorney and that they will not pay in advance for treatment and will only reimburse those amounts you have paid out of pocket. Do not listen to any insurance company as to how or what you should do. It is in the insurance company’s best interest that you not hire an lawyer. We recommend that you seek out and speak with an Injury Lawyer to protect your rights.

Must I Prove That the Animal That Attack me was Vicious in Order to Recover?

The answer to this question will depend on whether the dog is considered a dangerous breed of dog or animal. If you are bitten by a dog that has never shown signs of aggression, the owner might be able to argue that he could not have prevented the attack because he had no reason to know that the dog would bite. In contrast, if the attack is by a guard dog or a dog bred for aggression or fighting (such as a pit bull) or the animal has shown aggression in the past, the owner will probably be liable for not taking the necessary steps to prevent your injuries. Again, the best way to pursue a claim arising out of an animal attack is with a lawyer who can help you determine the precise scope of your rights under a given set of facts.


Thorough Dog Bite Investigation

Dog bite liability often turns on the investigation that was done soon after the bite. It is crucial to investigate the facts surrounding the dog attack, the dog bite injury itself and the dog owner. Experienced Missouri dog bite attorneys will conduct a thorough investigation of the facts. The lawyers at our firm always:

  • Obtain the police report;
  • Obtain the animal control report;
  • Take recorded statements from the dog owner and anyone that witnessed the animal attack; and
  • Interview neighbors that lived near the dog.

This investigation needs to be done as soon as possible. The more time that goes by, the more witness’ memories fade, scenes change, and vegetation grows or is cut back.


Seeking Compensation for an Animal Attack

Dog bites can be extremely painful, especially for young children. They often require surgery or stitches, and depending on how deep the wounds are, you could experience emotional distress as a result of permanent scarring. Animal bites are also more susceptible to become infected, as they can be difficult to clean thoroughly. Our personal injury attorneys in Vermont are committed to providing you with dedicated representation and proving that the dog or animal owner was at fault.

In order to prove a dog or animal bite case, a few factors but be taken into consideration:

  • Was the dog dangerous? Did it show signs of aggressiveness in the past?
  • Was the person injured legally on the premises where they were bit?
  • Was the dog or animal contained or was it allowed to roam free?

A Beginner’s Guide To Basic Open Water Testing

Well ​Water Testing

Water samples are tested for two types of bacteria: total coliforms and E. coli.

Total coliforms. These bacteria are often found in animal waste, sewage, soil and vegetation. If they are in your drinking water, it means contaminated surface water may be entering your well.

coli (Escherichia coli). These bacteria are normally found only in the digestive systems of people and animals. If they are in your drinking water, it usually means that animal or human sewage waste is entering your well from a nearby source.

If these bacteria are in your water, they could cause illness such as stomach cramps, diarrhea, and other symptoms, which can lead to additional health concerns. All private well owners are encouraged to get their water tested every spring, summer and fall, even if it looks, tastes and smells fine.

We also recommend that you test your water:

After any repairs to your well;

If your well hasn’t been used for several weeks;

If there is flooding in the area; or

If you notice a change in your water (e.g. smell, taste or colour).

Whether your test results are positive or negative, it is important to understand that the sample you collected is just a “snapshot” of your well’s water quality. The more samples you have tested, the more confident you can be about the quality of the water you and your family are drinking.

In addition to regularly testing well water, owners should inspect their well at least once a year to make sure it is free from damage and in good working condition.

The lab will only accept water samples taken directly into the proper water testing bottle. The sample should only be taken from an indoor drinking water tap, from a kitchen or bathroom.

Wash hands before taking the sample.

Remove screen, aerator or other attachments from kitchen faucet.

Clean end of the faucet with an alcohol swab or diluted 5.25% bleach solution

[1 part household bleach to 10 parts water = 50 mL (1/4 cup) bleach to 500 mL (2 cups) water or 10 mL (2 tsp) bleach to 90 mL (6 tbsp) water]

Run cold water for at least five minutes.

Keep sample bottle closed until the moment you are ready to fill it.

Remove the bottle cap and hold the cap between the fingers, not touching the inside or setting it down to touch a surface (like the counter).

Do not touch the inside of the bottle or rinse the bottle out since it contains a preservative for transporting.

Hold the bottle near the bottom and fill to the 200 mL fill-line (maximum amount) and recap immediately.

Keep the blue card and attach one barcode sticker from the bottle, for your records; you will need this code if you wish to call the lab for your results.

Put your name on the label found in the bag that came with the bottle, attach it to the bottle, then place the completed form back into the plastic bag provided, and attach it to the bottle with the elastic.

Transport samples to the drop-off locations within 24 hours of taking the sample. Your water sample should not be left sitting for a long period of time as this can lead to inaccurate results. Samples must be kept cold after sampling. If you are transporting samples on a hot day, keep in a cooler with an icepack or bag of ice.


Water Testing

Testing Your Well Water

Test your well water once a year for bacteria and nitrates and every 5 years for arsenic, fluoride, uranium, radon, lead, and manganese.

If you have never tested your well water, we recommend doing a comprehensive or standard water test. Other times to test your well include:

If you are expecting a baby

Your water changes in smell, taste, and color

Your well runs dry and comes back

When buying a new home

After installing a water treatment system or replacing parts of your treatment system

After any work is done on your well

Get our brochure to learn more about well water testing

Common Well Water Contaminants and Problems

Arsenic

Fluoride

Lead

Manganese

Radon

Uranium

Corrosive Water External site disclaimer (Penn State Cooperative Extension)

How to disinfect or shock your well to remove bacteria (Maine Health and Environmental Testing Laboratory)

How to disinfect or shock your well to remove bacteria (Maine Drinking Water Program)

If you think your well has been contaminated by a sand/salt pile External site disclaimer

If your well has been flooded

Fixing Well Water Problems

Help paying for arsenic treatment External site disclaimer

Choosing a Radon Treatment Company

To make sure a treatment system is certified to remove a contaminant


Water Testing

Residential Home Owners

Unlike public water systems, which are regulated by the U.S. Environmental Protection Agency (EPA), private water supplies, like cisterns, wells and springs, are the responsibility of the homeowner and should be tested periodically to be certain they are safe for drinking.

Commercial Water Testing

Many businesses are required by the state to have their water tested routinely. Guthrie LEAP Testing Service is accredited for a variety of potable and non-potable analytes.

Legionnaires’ disease is caused by a type of bacteria called Legionella. Legionella bacteria are found in water sources including rivers, ponds, decorative fountains, cooling towers, hot and cold water systems and spas. Routine testing for Legionella pneumophila has been shown to reduce the risk of outbreaks. Legiolert is a 7-day culture test for Legionella.


Drinking water quality

Drinking water quality is an important public health issue

Drinking water quality is an important public health issue, so state and local officials closely monitor for contaminants and work together to protect water quality. Drinking water can be contaminated by man-made chemicals or by natural sources, like heavy metals in rock and soil. Natural waters contain impurities. Most impurities are harmless. However, drinking water that has certain levels of micro-organisms, minerals, man-made chemicals, or naturally-occurring pollutants can be harmful to your health.

Systems must meet Safe Drinking Water Act standards

MDH published Drinking Water Annual Reports provide summaries of water sampling and monitoring results. Local water suppliers also publish their own annual water quality reports (Consumer Confidence Reports) and distribute them to their customers. These may be obtained by request from local water utilities or through MDH’s Search for your Consumer Confidence Report (CCR).

has a vast amount of aging infrastructure. To continue to supply safe drinking water, communities will need to replace this infrastructure over the next few decades. For more information, visit the State Auditor’s  Infrastructure Stress Transparency Tool Version 2.0, a series of interactive maps that visualize data

Climate change impacts should be considered in all drinking water planning and operations. The MDH Climate & Health Program is working to increase awareness of the public health impacts of climate changes to our water quality and quantity.

People with private wells should get them tested

About twenty percent rely on private, household wells as their source of drinking water in their homes. While community water systems are tested regularly for a variety of contaminants, only newly-constructed private wells are required to be tested for contaminants


Well Water Testing

WATER BACTERIOLOGY TESTING FOR TOTAL COLIFORM/E. COLI

The Laboratory performs testing for Total Coliform/E. coli in drinking water for public water systems and private individuals with well water systems. The laboratory is accredited and certified to perform both presence/absence and enumeration testing.

FEES

Total Coliform/E. coli – Presence/Absence Test:

$16.00/sample

E.coli Enumeration Test:

$20.00/sample

AVAILABILITY

Water Testing is performed Monday through Thursday. Samples must be received prior to 3:00 p.m. on those days to insure enough time for sample processing and testing before the laboratory closes at 5:00 p.m. Testing is not performed on Fridays because the test takes 24 hours and the laboratory is closed on weekends.

FREE COLLECTION BOTTLES

The laboratory provides free sterile and buffered collection bottles for the collection of samples, and these are the only acceptable containers. Home-sterilized containers are not acceptable, as we cannot guarantee sterility as well as they do not contain a special buffer that assists in bacteria recovery. For this reason, only approved sample containers will be accepted. If you need them, please stop by our laboratory and pick them up for free.

SPECIAL FEES

There are special fees for special samples or samples that required repeated manipulations, extra work, or overtime to analyze. These fees will apply only to special or specific samples and should not normally be incurred when ordering Total or Fecal Coliform tests. If there is a special fee for your sample, you will be informed of this when you bring your sample to us for analysis.

Accountant And Developing Countries

Rectification Of Accounting Errors

Financial accounting deals with recording and maintaining every monetary transaction of an organization. However, sometimes, a few entries might be either incorrect or used at the wrong place. In financial accounting, the process of correcting such mistakes is known as Rectification of Errors.

Types of Errors

Two most common types of errors, which are usually occurred at the time of preparation of Financial Statements are discussed below.

Error which Effect only One Account

  • Omission of posting of balance in a Trial Balance.
  • Error of carried forward of balance.
  • Error of casting and posting.

Error which Effect Two or more Accounts

The nature of errors, which occur during the preparation of Financial Statements are −

  • Error of posting in wrong account.
  • Error of principle.
  • Error of omission.


Rectification of Errors not affecting the Trial Balance

These errors affect two or more accounts simultaneously. Thus, these are two-sided errors. We can rectify these by passing a journal entry giving the correct debit and credit to the accounts. In order to rectify an error, we need to cancel the effect of wrong debit or credit by reversing it and restore the effect of correct debit or credit.

When there is short debit or excess credit in an account we need to debit the concerned account. Whereas, when there is short credit or excess debit in an account we need to credit the concerned account.

Complete omission to record an entry in the journal or the subsidiary books, incorrect recording of transactions in the books, complete omission of posting and errors of principle are the examples of these errors.

Rectification of Errors affecting the Trial Balance

These errors affect only one account. Thus, these are one-sided errors. We can rectify these errors by giving an explanatory note in the account or by passing a journal entry with the help of Suspense A/c. When we detect an error before posting to the ledger, we can correct it by simply crossing the wrong amount, writing the correct amount above it and initializing it. Similarly, we can also correct an error in the ledger account.

Errors of casting, errors of carrying forward the balances, errors of balancing the accounts, errors of posting the wrong amount in the correct account, error of posting in the correct account on the wrong side, omitting to show an account in the trial balance, posting in wrong side with wrong amount are the examples of errors affecting the Trial Balance.


Methods of Rectifying Accounting Errors:

  1. Striking of the Wrong Entry:

Under this method wrong entry is erased or struck out as and when it occurs or noticed. But this method is not advisable because it helps perpetration of fraud. It is also objectionable because it affects the legal value of books of accounts and makes them appear clumsy.

Besides, it is complicated because often correction of one mistake will necessitate erosion in different sets of books. Hence, this method is not adopted.

  1. Making Appropriate Entries to Correct the Errors:

This method is applicable to Errors of Omission, Commission, or Principle. If the error is of full omission, then the full-omitted entry is passed. If it is of partial omission, the entry left out is made.

If the error is one of commission, rectifications are made either by additional entry or by opposite entry taking into account the nature of the error. This method is scientific and hence preferred one.


Effects of Errors on Financial Statements

Effect of error depends on the nature of effected accounts. If errors relate to nominal account, it will either increase or reduce the profit and rectification will reduce excess profit or Loss. Effect of error on Trading and Profit account ultimately effect the Balance-Sheet of a company too, because reduced profit or excess profit ultimately transferred to capital account, which is a part of the Balance Sheet.

There are some errors, which effect Trading or Profit and Loss account and Balance sheet simultaneously, like entry of depreciation will affect profit as well as value of the Fixed Assets.

Some entry may effect on Balance sheet only like, for instance omission of entry of cash paid to purchase fixed assets will affect Balance Sheet of a firm only.

Rectification of Errors after Preparation of Final Accounts

To remain unaffected Profit or Loss of the current financial year, the errors, which took place in last financial years are adjusted and rotated through a Profit & Loss adjustment account. Balance of this account directly transferred to capital account of firm without affecting the current year profit or loss.


Suspense Account

When the trial balance does not tally due to the one-sided errors in the books, an accountant puts the difference between the debit and credit side of the trial balance on the shorter side as the Suspense A/c. As and when we locate and rectify the errors, the balance in the Suspense A/c reduces and consequently becomes zero. Thus, we cannot categorize the Suspense A/c. It is a temporary account and can have debit or credit balance depending upon the situation.

While using the Suspense A/c to rectify the one-sided errors, the accountant needs to follow the following steps:

  • Identification of the account with the error.
  • Ascertainment of the excess debit or credit or short debit or credit in the above account.
  • In case of short debit or excess credit in an account, we need to debit the concerned account. Whereas, in case of short credit or excess debit in an account we need to credit the concerned account.
  • Pass the necessary journal entry by debiting or crediting the Suspense A/c

You Need A Financial House Cleaning

How to clean a ceiling fan and when to do it

Warm weather and ceiling fans go hand-in-hand. The hotter the days, the longer the fans run — and the more that dust collects on the edges of the blades. Unless you want clumps to fling around every time you turn it on, you need to start dusting those blades

How to clean ceiling fans without making a mess

The other method involves climbing a ladder. It’s harder, but you can take care of several chores while you’re up there: cleaning the blades, the motor, the fan’s direction, light bulbs and glass shades. But, of those, the only chore you need to do weekly is dust. The others can be done two or three times a year or as needed.

Here’s what to do:

Before turning off the fan, notice if it’s spinning clockwise or counter-clockwise. If you haven’t done so already, switch the direction the fan spins to accommodate the season. Clockwise warms a room; counter-clockwise cools it. (The more you know!)

Slip a pillow case over the blade, then use the case to wipe the dust off the sides, top and bottom. That way, all the dust stays on the pillow case — instead of going everywhere! Repeat for each blade and remember to press lightly or you’ll damage the blade. (When you’ve come down from the ladder, take the pillow case outside, turn it inside-out and give it a good shake so that the dust comes off on the lawn instead of your floor. Then simply launder the pillowcase as usual.) To reduce future dust buildup, Vila recommends using a dust-repelling spray like Endust (or a DIY version: one part liquid fabric softener to four parts water). Spray it on a microfiber cloth and wipe both sides of the blade.

Motor: Wipe the pull chain and the motor housing with a clean cloth. Spray motor housing with compressed air to remove interior dust.

Light bulbs: Change light bulbs as needed. If bulbs are still working, wipe them with a dry microfiber cloth to remove dust

Glass globe or shades: Remove and wash in warm, soapy water. Rinse and dry completely before replacing. Make sure the mounting screws are tight so the glass won’t rattle or shake while the fan is on.

For extremely dirty blades or kitchen fan blades that are caked with grease, wipe with a damp cloth first to remove dust and dirt. Then apply an all-purpose cleaner, or whatever cleaner is recommended by the fan manufacturer, to a sponge or cloth and wipe each blade to remove grease. Rinse cloth after cleaning each blade and repeat as needed. Then wipe each blade dry.


How to clean carpet — and how often to do it

Dirty carpets not only look bad, they’re also loaded with pollutants and grime. These dirt particles act like sandpaper, breaking down carpet fibers every time you walk on them. That’s why it’s important to clean carpets regularly.

Vacuum

The best way to keep carpets clean is to vacuum them s-l-o-w-l-y, back and forth in repetitive strokes. How slowly? says it should take about 15-20 minutes to properly vacuum a 300-square-foot room. Doing so removes 83 percent of the dry soil in the carpet. In the average household, vacuuming should be done at least twice a week.

Professional cleaning

Now here’s a surprising bit of advice. If you want to extend the life of your carpet, it is important to have it professionally cleaned at least once a year. According, most carpet manufacturers recommend the steam-cleaning method. This penetrates deep into the fibers and lifts out the dirt and the many pollutants we track in on our shoes. Also, it removes most of the moisture, so carpets dry fast

DIY steam cleaners

Sure as the sun rises, there will be times when your carpet needs an emergency cleaning. For larger messes, a DIY steam cleaner works, but do not use the cleaning solution that comes with the steam cleaner, cautions. This leaves behind a soapy residue that will attract dirt. Instead, use water and, if you need a boost, a drop of dish detergent or even a bit of white vinegar.

If one of those “emergency” cleanings is due to muddy footprints, offers a time-saving tip. Allow mud to dry first, scrape dried mud off the carpet, then vacuum. Clean remaining stain with steam cleaner or with the water/drop of Dawn solution and a cloth. Blot dry.


Here’s how to clean painted walls without ruining the color

You love your sunshine yellow walls, but that crayon masterpiece your 2-year-old created might not be yoru favorite. Before grabbing a scrubby sponge and your favorite spray cleaner, here’s what a professional painter has to say about safely cleaning those colorful walls. It’s so simple, you may be surprised!

How to clean latex-painted interior walls

cleaning walls depends primarily on whether the paint is oil-based or latex. To safely clean latex-painted interior walls, follow these steps.

What you’ll need:

Dish detergent

Water

Bucket

Distilled white vinegar

Sponge

What you’ll do:

Mix three or four drops of dish detergent in half-filled bucket of water. (Or you can go “old school” using two or three tablespoons of distilled white vinegar to a gallon of water.)

Wet a sponge in the mixture and wring it out to dry. (This is important as you don’t want to mess up your walls with lines of dripping water.)

Wipe off the dirt, rinse the sponge and repeat as needed. This works for all types of latex paint — flat, semi-gloss and gloss.

Make sure the sponge is wrung out dry before cleaning around electrical outlets, light switches and telephone connections. Before cleaning dirty outlet covers, turn off electricity to those areas to avoid shocks.

Bias cautions that you should never use a degreaser or any other harsh chemical cleaners on latex-painted walls. “If marks don’t come off using just soap and water or white vinegar and water, you’ll have to repaint. “

How to clean oil-based painted interior walls

Because oil-based paints are a bit hardier, in addition to cleaning with the detergent/vinegar and water mixture, you can safely use a mild degreaser to remove grease, especially on kitchen walls.


How to mop correctly and the best mop to use

The best mop to use

When first went into business, his favorite tools for mopping were a string mop and a bucket. For years, that’s how and his workers cleaned floors. In fact, if it weren’t for the discovery of one item, he’d probably still be using a string mop today. Since the invention of microfiber, with its thousand-plus fibers per square inch, has changed his style. He now uses a mop that has a reusable microfiber pad instead of strings.

“I haven’t found anything that cleans better than a microfiber pad mop,” “It picks up dirt fast and easily and does the job without bulky buckets.” Just be sure to use the microfiber pad best suited for each type of floor, he adds. Hardwoods and laminates clean easily with a short loop microfiber, while tile floors need longer fibers — or “noodles,” as Aslett describes them — to reach down into grout.

Find the right cleaning solution

For string mops:

recommends an easy cleaning solution: a quick squirt of dish detergent in a bucket of water. “Dish detergent is made to cut through grease and grime. Just don’t use too much or the floors will be dull.”

For microfiber pad mops:

The best part about mopping with microfiber is that you only need plain water and a small amount of your favorite cleaning solution, which often saves money.

How often should you mop?

To put it simply, you should mop when the floor looks dirty. For small households, this may be every other week; for households with kids and pets, it may be once a week or more.

How to mop

Start with a floor that’s well swept, vacuumed or mopped for dust. Otherwise, you’ll be pushing food, dust bunnies and who knows what else all around the room.

String mop method:

For lightly soiled floors, wiping just once with a damp mop may do the job. For heavily soiled floors, you’ll likely have to mop twice. The first time, wet the entire floor (don’t flood it, just get it good and wet). This will loosen the dirt and any sticky goo. Mop around the edges first, then move to the middle of the floor, using overlapping, figure-eight strokes. When one side of the mop gets dirty, turn the mop over to the clean side. When both sides are dirty, wash the mop in the bucket; otherwise, you’ll be spreading dirt around instead of removing it. If any stubborn soil remains, remove it with a scrubber before rinsing.


How to clean a keyboard — and how often you should do it

Ah, our computer keyboard — we pound on it for hours with Cheetos-stained fingertips, yet we never give a thought to cleaning it properly. But we should. Let’s face it: keyboards are disgusting. That’s why TODAY Home checked with Logitech and Apple for advice on how to clean keyboards (on laptop or desktop) properly. They should be cleaned one to two times a month using the steps below.

ecommends the following cleaning tips:

The first thing you want to do is turn the keyboard off or disconnect it from the computer before cleaning. “It’s a safety measure when dealing with electronics,” said . “Plus, you don’t want to accidentally send someone an email.”

Use only a damp, soft cloth, like microfiber, to wipe the keys and keyboard. There’s a special coating on the keys that prevents the letters from rubbing off. Using harsh chemicals or abrasive materials to clean the keys could irreversibly damage this coating and cause an even bigger problem later.

When it comes to removing dried-on gunk from hard-to-reach places on the keyboard, recommends using a slightly dampened swab or a dry, soft toothbrush.

To clean out dust, particles and crumbs, use a can of compressed air. Just make sure to use the straw that comes with the can and never spray while holding the can upside down. Doing so may cause propellant to spray on the keyboard. Don’t have compressed air? suggests turning the keyboard upside down and shaking or tapping it gently to dislodge debris.

Because laptop keyboards sit atop the electronic components of the computer, extra care should be taken when cleaning them. Here are the instructions that Apple gives for cleaning a laptop

Disconnect the laptop and allow it to cool.

Wipe the keyboard using a, clean, lint-free microfiber cloth that’s lightly dampened with only water. Avoid getting moisture directly into any of the openings. Never spray water directly on the keyboard.

To remove debris from between the keys, use a can of compressed air. Make sure the straw’s attached to control the airflow. Do not turn the can of compressed air upside down while spraying. This could spray propellant, instead of air, onto the keyboard.

Apple recommends the following technique when using compressed air. Open the laptop. Hold it so that the keyboard is at a 75-degree angle, tipping slightly backward. Spray the keyboard with compressed air, moving the can from left to right. Keep the end of the straw about a half-inch away from the keyboard while spraying.

Turn the laptop to the right and spray the keyboard again, from left to right, top to bottom. Then turn the laptop to the left side and spray, left to right, top to bottom.

How to disinfect keyboards

There are times when you may want to disinfect a keyboard, especially when using a public computer or one with multiple users. According to Apple’s website, use Lysol Wipes or Clorox Disinfecting Wipes to do the job. Do NOT use disinfectant sprays or wipes containing bleach

First turn off the computer, unplug the power cord and remove the battery if cleaning a wireless or portable keyboard.

Using light, gentle strokes, wipe the keyboard first with a disinfecting wipe. (If a wipe is too wet, squeeze out excess liquid before using it. Don’t allow the liquid from the wipe to remain on the area too long.) Wipe again with a damp, soft, lint-free cloth, such as microfiber.

Dry with another soft, lint-free cloth.

Review Dentist

What happens if you never go to dentist?

Going to the dentist every six months sometimes can feel too frequent. Can anything change in a mere six months?

Many adults skip going to the dentist every six months for a variety of reasons including fear, embarrassment, forgetfulness and inconvenience.

While it may be a hassle to see your dentist every six months, what will happen to your teeth if you don’t regularly see your dentist? The answers are not pleasant:

Plaque Buildup

When you skip a thorough cleaning at the dentist office, the plaque trapped in those hard-to-reach-places will harden into tartar. Tartar is difficult to remove with at-home brushing and flossing. The dentist will have additional equipment that will better remove the tartar.

Even the best at-home dental hygiene practices will not prevent plaque from being left on teeth and accumulating.

Tooth Decay

The build-up of plaque and the formation of tartar will lead to tooth decay if not treated by a dentist. Tooth decay can lead to a mess of other dental health issues including bad breath and ultimately tooth loss.


Tooth Loss

Tooth loss can be the result of either advanced, untreated tooth decay or advanced, untreated gum disease. Regular visits to the dentist will help prevent either of these unpleasant oral health issues from progressing to the point where tooth loss occurs.

Gum Disease

It can be easy to forget about the health of your gums, especially if they aren’t painful or causing any kind of discomfort. Gingivitis, or early stage gum disease can be present even in red and swollen gums that feel fine. Patients who don’t visit the dentist risk their gingivitis turning into the much more serious periodontal disease. It is common that patients with advanced stages of periodontal disease experience jaw bone loss and tooth loss.

Regular visits to your dentist allows a dental professional to perform an early diagnosis to catch and treat gingivitis at an early stage.

Bad Breath

All the bacteria, plaque and tartar build up in your mouth will lead to less-than-pleasant smelling breath. Bad breath can also be the result of periodontal disease, something you may not catch if you don’t see your dentist.


Cavities

Cavities are the obvious and likely outcome of a mouth that hasn’t been cleaned or examined by a dentist for some time. The build-up of bacteria, plaque and tartar gradually eat away at tooth enamel, causing holes in the tooth. These are cavities. Small cavities can be easily filled. Large, extensive cavities, however require more dental work such as crowns and possibly a root canal. Patients who don’t see their dentist regularly risk their small, easily treated cavity turning into a much larger, harder to treat one.

Tooth Stains

The accumulation of tartar and plaque will not only increase the risk of cavities and tooth decay, but they will also leave an unpleasant stain on your teeth which will only get worse the longer you put off going to the dentist.

Oral Cancer

Each time you visit the dentist for a teeth cleaning, an examination is also done. Part of this dental exam includes a screening for oral cancer. The longer you postpone going to the dentist, the longer you’ll go without checking for potentially deadly oral cancer. If you haven’t gone to the dentist for an extended period, you may be at risk of having the onset of oral cancer and not know it.


Risk of Disease and Illness in Other Parts of the Body

More studies and research have linked one’s oral health to one’s overall health. Patients who neglect proper care of their mouths by not regularly seeing a dentist, risk not only getting tooth and gum disease, but they also risk getting diseases and illnesses in other parts of their body. Some major health conditions related to oral health include heart disease, diabetes, stroke and breast cancer.

Abscesses and Infections

The longer one goes without going to the dentist, the longer any abscesses or cuts can spread and get infected. Some abscesses are not readily noticed and can only be detected via x-ray, which any dental office will have. Infections can lead to pain, discomfort and additional oral health concerns that require additional treatment.


Things That Happen If You Avoid the Dentist

Many people believe good oral care means they only need to brush their teeth once or twice each day, and floss once daily. While these are important actions, it’s also necessary to schedule regular dental appointments for a checkup and professional teeth cleaning.

Consider four things that happen if you don’t:

  • Tooth decay – Daily tooth brushing and flossing help keep plaque under control. Plaque is created by food particles that join with bacteria to form a substance that adheres to teeth. If not removed, plaque can break down tooth enamel and cause decay. During regular dental checkups, dental professionals clean and remove plaque. Skipping these appointments allows bacteria to flourish and attack your teeth and gums, and create decay that may require extensive restorations, such as a root canal or crown, and also cause bad breath.
  • Gum disease – Untreated tooth decay can lead to gum or periodontal disease. The gums are designed to provide a tight cover around your teeth and roots. Plaque bacteria can attack the gums, causing swelling and bleeding, allowing bacteria to settle underneath. If not treated properly, this condition, called gingivitis, can lead to periodontal disease.
  • Health problems – During a checkup, dental professionals also may detect signs of serious medical problems. Catching these problems early may help you avoid expensive medical bills. If you don’t regularly see the dentist, health problems, such as hypertension, diabetes, oral cancers, kidney failure and heart disease may not be discovered until they’re in a more advanced stage. Often it’s because people see their dentist more often than their regular medical doctor.
  • Stains – Drinking coffee, tea and wine, or smoking cigarettes can stain teeth and create an unattractive smile. Professional teeth cleanings help remove stains. However, dark discolorations may require cosmetic dentistry procedures to remove stains and whiten teeth.

Deep Cleaning A Commercial Kitchen

Frequently Asked Questions

QUESTION: What exactly will I learn?

ANSWER: You’ll learn the professional way to sell additional cleaning services to your existing clientele.  Then, you’ll learn how to incorporate those extra care tasks into your regular cleaning routine… at an additional cost.

QUESTION: What makes this guidebook any different than any other “how to clean” resource?

ANSWER:  This guide takes you from start to finish highlighting the exact steps to take in order to upsell your cleaning services.  There is a haphazard way to upsell, and there’s a professional way.

QUESTION: How long will the bonus be offered with this guide?

ANSWER: The bonus will go away soon.  It’s best to act now because the bonus is a paid product valued at $25!  It features 25 different house and office cleaning tasks such as window cleaning, wall washing, floor strip and wax jobs, lampshade cleaning, refrigerator and dishwasher detail cleaning items.  Each with a cleaning supplies list, step by step instructions and a some tasks have videos!  It’s a steal all on it’s own.

QUESTION:  How long do I have to wait for it to be shipped to me?

ANSWER: No wait at all!  You’ll get the  book digitally downloaded via email the very moment you check out.  You will have immediate access to all instructions, all links, pages and bonuses.

Upselling is a powerful marketing tactic.   It’s one way for professional house and office cleaners to offer extensive cleaning maintenance and sanitizing services.


Instructions for Deep Cleaning

Periodontal disease can affect one tooth or many teeth. It begins when bacteria in plaque (sticky, colorless film that sticks to your teeth) causes the gums to become inflamed. In the mildest form of the disease, gingivitis, the gums redden, swell and bleed easily. Gingivitis only effects the gums and can be reversed with consistent and good brushing, flossing and routine cleanings.

Untreated gingivitis can lead to periodontal disease (gum disease). With time, plaque can spread and grow below the gum line. The longer plaque and bacteria stay under the gums, the more irritated your gums can become. Toxins released by bacteria stimulate your body’s inflammatory response and in essence, the body turns on itself and destroys the supporting tissues and bone around the teeth creating pockets. Pockets can become increasingly difficult to clean and maintain with regular brushing and flossing if they progress down the roots. Eventually, your gums will recede and ultimately, your teeth can become loose.

Scaling and Root Planing (Deep Cleaning) is a procedure that involves removing bacteria, plaque and tarter from the root surfaces involved with the pockets. We do this with hand instruments and ultrasonic tips. The goal of this treatment is to allow reattachment of the gums to the clean root surface and to shrink the periodontal pockets to levels that can be maintained by daily oral hygiene. The following guidelines have been prepared for you in order to maximize healing and minimize any discomfort.

You may take an over the counter pain medicine like ibuprofen (advil) or acetaminophen (Tylenol). Avoid asprin.

Rinse with warm salt water- 1 tsp salt + 8oz of water before bed the first night

After brushing and flossing, rinse with Chlorhexidine (peridex), for 30 seconds in the morning and the evening for 10days. Do not rinse with water afterwards.

Avoid strong spicy seasonings, and hard crunchy for the next few days. Smoking should be stopped. Success of the treatment will be substantially reduced by the cigarette smoke chemicals in your body. As the tissues heal, some temporary sensitivity to cold may occur.


Deep Cleaning : The Down and Dirty Guide to Proper Cleaning and Sanitation

Deep Cleaning. One of the most beneficial things you can do for yourself and your family—especially when preparing for flu season—is to perform deep cleaning throughout your home. A deep clean is designed to not only catch those areas of dirt and grime that are often missed during weekly cleaning sessions, but also to completely disinfect the home, ridding it of bacteria, viruses, and toxic mold. Properly sanitizing your home in this way can significantly reduce your family’s risk of illness, as well as controlling allergy symptoms and helping to prevent asthma attacks.

Cleaning Household Surfaces

Surfaces are notorious germ carriers due to their frequent use (particularly for things like food preparation), so any deep clean should begin with fully disinfecting them. Acrylic and glass surfaces should first be wiped down with a damp microfiber cloth (use color-coded cloths to avoid cross-contamination between bathroom and living surfaces), then washed with either a mild detergent and water solution if the surface is acrylic or with an ammonia and water solution if the surface is glass. Be sure to rinse with a clean damp cloth in order to rid the surfaces of residue.

For cleaning appliance surfaces, floors, and walls, you should use an all-purpose non-abrasive cleaner, with the exception of stove-top areas where baked-on food is present; to remove baked-on food, you should use either an abrasive cleaner or baking soda (which acts as a natural abrasive). Sinks and toilets should also be cleaned with an abrasive cleaner (ideally a quaternary cleaner; more on these below) in order to remove stains and bacteria, and you should be sure to scrub these areas gently but thoroughly with the appropriate instrument before rinsing.

Properly Tackle Nasty Areas

Contrary to popular belief, bleach does not destroy the pathogens present in mold, nor does it prevent the mold from simply growing back, even when it is used at full strength. Bleach is also highly destructive to household surfaces due to its corrosive nature. To remove mold from various surfaces within your home and prevent it from forming again, you should instead use what is known as a “quaternary ammonium cleaner”. These are not, it should be noted, ammonia-based solutions; instead, they are composed of various anti-microbial salts, known as quaternary ammonium chloride salts, which have been shown to eliminate the pathogens in mold (as well as killing many common viruses, such as the Norovirus, a virulent form of stomach flu). Called “quat cleaners” for short, these salts have been used as disinfectants in food processing for years owing to their efficacy in killing mold.

However, while quat cleaners have a long history of safe use when handled properly, they can be dangerous if one does not follow strict safety precautions. If you’re unsure of how to use quat cleaners or have an extensive mold infestation within your home, it is strongly recommended that you hire a professional mold removal service rather than attempting the task on your own.


How Much Does Deep Cleaning A House Cost?

Homeowners typically pay a flat rate between $200 and $400 for a deep cleaning service. Some companies charge by the hour at a rate between $25 and $50 per hour. Finally, some charge per square foot, and cost depends on the size of your home. A home smaller than 1,000 square feet starts at $100+. A home that’s 3,000 square feet or larger starts at $300 to deep clean.

Cost factors include the square footage of your home, the number of rooms and bathrooms, the size of your kitchen, and the level of dirt and grime build-up in your home.

A deep clean is different from regular maid services. With this type of work, you can usually expect a team to come in and pay special attention to every area of your home, from the cobwebs in the corners to the carpet beneath large furniture. Frequently used areas like a kitchen or bathroom may take longer

Deep Cleaning a House Cost

One-time services range from $200 to $400, but companies vary in the way they charge. Expect to pay one of the following average rates:

$25-$50 per hour

$200-$400 flat

Small House (up to 1,000 square feet): begins at $100

Larger Home (3,000+ square feet): begins at $300

For context, hiring a maid service costs between $120 and $240 but doesn’t include the type of thorough disinfection you’ll find with a deep clean.

Deep Carpet Cleaning Cost

Professional carpet cleaning costs between $130 and $240, or between $0.20 and $0.40 per square foot. Rather than charging by the hour, carpet pros typically charge you based on the number of rooms you’d like them to tackle, or by square foot. To maximize the lifespan of your carpet, clean it every 6 to 12 months.


Deep cleaning

”’Deep cleaning is the process of taking a room out of a hotel’s salable inventory and thoroughly cleaning it to more exacting standards than is normally performed during the daily housekeeping maintenance.”

The ‘Deep Cleaning Checklist’ template has summarized and organized the deep cleaning process into a series of steps outlined below:

Turn the Mattresses and Change the Bedspread

Dust High and Hard to Reach Areas

Clean Window Glass and Draperies

Clean Walls, Carpets and Doors

Clean TV and Other Electronics

Clean Light Shades and Fire Exit Map

Clean Furniture

Clean Bathroom

With cleanliness comes quality. The focus of the hotel industry is to create a positive experience for the customer. It goes without saying hygienic, serene, pleasant and welcoming surroundings will significantly contribute to achieving this.

84% of travelers rated cleanliness as ‘very important’ when choosing hotel accommodation. Ensuring your hotel is clean is not only about obtaining good customer reviews. Poor sanitation can lead to the transmission of disease, such as fungal and bacterial infections.

The ‘Deep Cleaning Checklist’ standardizes the process of deep cleaning rooms. This checklist acts as a guide, ensuring steps are not forgotten. Checking off each task as it is being completed within a checklist, has been shown to increase the efficiency and productivity of any given process.

Humane Rodent Pest Control

HOW TO GET RID OF MICE IN YOUR HOME

Mice: A Big Problem in a Pint-Sized Package

You see a shadow move from out of the corner of your eye. Then, you start noticing droppings along your baseboards, in the pantry, and maybe even on the kitchen countertops. You might as well face it: You have a mouse in the house—and probably more than one! Once you get over the “yuck” factor, there are some simple, no-nonsense steps you can take to get rid of mice in the house.

Quick Guide to Getting Rid of Mice in the House

Choose the type of mouse trap or bait station that best fits your needs.

Put mouse traps or bait stations in places where you see mouse droppings or other signs of activity.

Store food in sealed containers and don’t leave crumbs lying around.

Don’t leave out bowls of pet food.

Seal up all cracks and openings that lead outside.

Use Mice Behavior Against Them

Mice are creatures of habit—they like to take the same path to and from their nests. They’re also very curious, so they’ll check out any new thing along the way. Those two behaviors will help you control your mice problem. Put your traps or bait stations in several places where you see mouse poop. If you don’t catch a mouse within two days, move the trap or bait station to another spot.

Keep Food Away from Mice

Mice need a nice, warm place to live. Your house will do just fine. They also need only a little food, and not much water—the moisture in their food is enough. Make sure you store your grains and cereals in sealed containers. You should also store your fruit, potatoes, and other perishables in your refrigerator. Sweep or vacuum up any crumbs, and keep your garbage can lid on nice and tight. A tidy home will help reduce a mouse’s attraction to it!

Put Pet Food Away

If you leave a bowl of food outside for your dog, you’re effectively hanging out a sign on your home that says “Mouse Café”. If you leave some food in a bowl inside, it can compete with bait you’ve put out for rodents. So if you want to get rid of mice, put the leftover food away, especially at night, once Fido has eaten, to help avoid a mouse infestation.


Rodent and Animal Removal Specialists on Thumbtack cost

How much does rodent removal cost?

On average nationwide, professional rodent removal costs between $95 and $235, with the average cost to homeowners being $165. The exact price you’ll pay for this type of pest control depends on the size of your house and the type and number of rodents you have. The worse your rat, mouse, or other rodent problem, the longer it’ll take for a pest control company or exterminator to take care of removal, clean up and repairs.

Since nobody wants these pesky critters coming back, professionals will also clean up affected areas and make home repairs that can prevent pests from returning. Typically, these prices do not include the cost of repairing damage done to the house by rodents, beyond cleaning up urine, feces and other small messes. If the damage is particularly bad, consider hiring a home improvement specialist to help once you’ve finished with the removal.

To help you understand how much it will cost to hire an exterminator or wildlife control specialist to get rid of rodents in your home, this guide will break down extermination costs and what to expect in the pest removal process.

What impacts the cost of rodent removal?

Ultimately, your pest control costs reflect how much time and effort it will take to get rid of any unwanted animals in your home. To account for this, some pest control companies charge by the hour for rodent removals. Others have set-rate packages based on what animal has taken roost and how severe the infestation and damage is.

Inspection

Some rodent removal services, such as Pest Control, provide free inspections. They use this time to assess the extent of a pest problem and create a custom estimate based on what they have to do to exterminate or remove rodents from your home.


Ultimate Rodent Prevention Guide

You’re enjoying a quiet evening by reading in bed before turning in for the night. A small sound catches your attention for a moment, but you ignore it. A moment later you hear it again. This time you set your book down and listen. It’s a light scratching sound, but where is it coming from? Outside? You listen harder and hear it again, this time a little louder. It’s definitely not coming from outside. In fact, it sounds like it’s coming from your ceiling. Sure enough, the more you listen, the more sure you are. There is something moving around in your ceiling.

While any number of pests could have gotten into your house, you will likely hear rodents scratching and moving around at night. In some instances, you won’t hear rodents in your home, but you’ll discover their existence in other ways. Maybe you’ll find packages in your pantry with holes in them or find small black pellets on your counters or in your cupboards.

House Mice

House mice are the most common species of mice to give. residents’ trouble. Although they can live outdoors, they prefer structures, especially homes that provide a steady source of food and water. House mice like to nest in dark, secluded areas, so you’re likely to find their nests in your attic or within wall voids if they get into your house. House mice are usually gray with cream colored underbellies. They have pointed noses, large ears, and range in size from 2 ½” to 3 ¾” long. Their tails add another 2 ¾” to 4” to their total length.

Norway Rats

Norway rats are the most common type of rat to be found. You may know them as sewer rats. While they are quite comfortable living outdoors the majority of the time, they often find their way into homes when fall and winter arrive. Unlike roof rats, Norway rats prefer to stay at ground level or below, so they often build their nests in basements.

What Makes Rodents Dangerous

Rodents are dangerous for a few different reasons and on a few different levels. First, they cause a lot of damage to the places they frequent. Rodents gnaw on almost any object they can get their teeth on, which means that once they get into your house, they’re going to damage your belongings. That’s the least of your worries, though.


Get Rid of Rats and Mice

Rats and mice will quickly take advantage of any source of food or shelter. These rodents consume food discarded by humans, and they can fit through the tiniest of openings to access your home. Learn how to eliminate these pests from your home, and prevent them from returning.

The most common rodent pathways are sill ledges, fence rails, foundations, electrical wires, pipes, tree branches and conduits. Inspect your home, outbuildings and landscape for these rodent signs: droppings, gnaw marks and burrows.

Get Rid of Mice and Rats

The Three Lines of Defense

Most baiting programs start once an infestation is discovered. By baiting along the three lines of defense, you’re preventing an infestation from occurring.

Perimeter of the Property

Use tamper-resistant bait stations along the perimeter of your property. Use block bait as it can be secured inside bait stations on vertical or horizontal securing rods. Choose the correct product to reduce the risk of secondary poisoning to nontarget animals.

Exterior Baiting

Rodents tend to gravitate to warm air currents or where food odors emerge. Tamper-resistant bait stations or traps should be placed every 30 to 50 feet, depending on the severity of the infestation. Place bait or traps around every entry door.

Interior Baiting

Rodent device placement depends on the type of infestation. For mice, space placements at 8- to 12-foot intervals depending on the severity of the infestation. For rats, space placements at 15- to 30-foot intervals, depending on the severity of the infestation.


Rodents

Rats are one of the most common invasive and harmful pests found in homes across America. Able to squeeze into openings just a 1/4 inch around, rats are adept at getting into homes and businesses, while spreading diseases and causing destruction wherever they go

What are Norway rats?

Norway rats are a species of rodent known for their keen swimming ability, and are thus commonly found in or around bodies of water. They have heavy bodies with blunt noses, small ears, and small, bulging, black eyes.

Adult Norway rats measure between 7 and 9-1/2 inches in length. Their tails are shorter than their bodies, usually between 6 to 8 inches in length, and are bi-colored, with dark coloration on top and lighter color on the underside. Their fur is shaggy in appearance, usually brown and scattered with black hairs. The fur on their underside is lighter than the rest of their body.

Are Norway rats dangerous?

Yes, Norway rats are dangerous to both people and properties. Like other rodents, Norway rats need to constantly chew on objects to keep their front incisors from overgrowing; this habit will damage baseboards, walls, personal property, and even electrical wiring. Norway rats will contaminate food and food preparation areas with their urine, feces, and saliva. They also spread serious diseases and bacteria to people and pets, and they carry harmful parasites such as mites and fleas that will infest homes and businesses.

Why do I have a Norway rat problem?

Outside, Norway rats burrow in things like garbage piles, woodpiles, and under concrete slabs. Like other household pests, Norway rats are drawn inside to find food, water, and shelter. Norway rat infestations are most common inside homes and businesses in late fall and winter months when the weather outside pushes them to seek warmth, food, and shelter. This species of rats are poor climbers and, therefore, invade the basements, crawlspaces, and ground floors of homes and commercial properties.