The Education And Roles Of An Commercial Electrical Remodel Contractor

COMMERCIAL ELECTRICAL RENOVATION

Are you planning to renovate your workplace? Do you need to expand your operations? Maybe you have changed your business model or recognize that it’s time to renovate that client waiting room. Be mindful of your electrical needs. We can help with electrical wiring and maintenance to your existing commercial workplace.

Commercial Electrical Upgrades

Business and telecommunications technologies updates are constantly progressing. Therefore, these upgrades often require reconfiguring your networking electrical cabling. To ensure maximum work efficiency, it’s important that as a business owner, you are keeping up with those updates. We can upgrade your business’ electrical service and infrastructure to greatly improve your connectivity and efficiency.

Commercial Retrofits

Sometimes, commercial retrofitting is a good option for an older commercial building to go through to bring that building back to code

Phone and data wiring

When it comes to phone and network installation, it seems as simple as plugging in a CAT6 cable into a modem and run it across the office. Also, it may seem as easy as taking telephone cables and running them across the office.

Office managers often overlook the differences in the types of cables. Since internet and telephone systems are different, proper installation requires different methods. Therefore, let your office manager take care of your office personnel and let the electricians take care of your wiring. We provide wiring and installation services for network cable, ethernet wiring, telephone systems, audio & visual needs and much more.

New electrical circuit installation

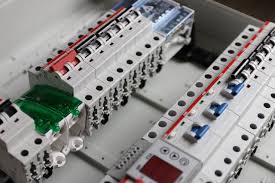
While single-phase electrical panels are sufficient to power residential homes, commercial buildings require more. This is because commercial needs are more demanding due to items such as large air conditioning units, large appliances, multiple computers, and even industrial machinery. As a result, commercial buildings often require 3 phase electrical panels installed by experienced commercial electrical contractors.


Electrical Upgrades to Consider During a Commercial Renovation

Renovations are a necessary evil most businesses have to go through eventually. If your business is growing, your building and its capabilities have to grow with it. Ideally, you’ll include enough innovation in your upgrade to keep from having to repeat the process for a number of years. The best upgrades include innovations aimed toward the future as well as needed improvements for today.

Before you finalize your plans, be sure to discuss these (and any other) changes that you want made in your commercial electric power and lighting.

Large Kitchen Appliances

When changing a building’s use from commercial sales to food service, wiring for large kitchen appliances is almost certainly necessary. If you’re adding a kitchen to any kind of commercial space, you’ll probably need three phase power, as well as additional outlets kitchen appliances such as ovens, deep fryers, and even walk-in freezers will use much more power than a typical retail space includes. Wire your kitchen area with more power outlets than you think you’ll need. If your business takes off, you don’t want to have to spend all that new profit on another upgrade in a couple of years.

Dedicated Circuits

If your business includes any kind of computer usage or computerized cash registers, your data and power usage is only going to increase as the years go on. Dedicated data circuits ensure that generalized power surges are less likely to damage electronic equipment than if they were all on one circuit with the rest of your equipment. Separate the areas of your business, including areas of high data usage, into a line of dedicated circuits that will help to ensure stable power quality all the time.

HVAC

Heating and air-conditioning are likely a big part of your power usage, and are likely to remain so in the future. The newer thermostats with timers and smart technology can pay for themselves in a surprisingly short amount of time. By changing the time and temperature the furnace and air conditioner work and coordinating it with your workday, you can save a substantial amount of money on your power bill. Have your electrical contractors update the wiring to the systems, as well as leaving space for future smart technology.


REMODELS & NEW CONSTRUCTION

The electrical infrastructure throughout your building is the foundation that keeps your business operating at peak performance.  From expanding current locations, to renovating current ones certified technicians ready to help you every step of the way.  As technology evolves, so does the electrical infrastructure needed to support a range of hardware and lighting.

Every renovation requires a thorough analysis to ensure all the additional additions to the building can be appropriately and safely powered have an array of electrical projects ranging from corporate offices, to warehouses, to small auditoriums, to stadiums.  Our team has everything you need to ensure every aspect of your project is achievable, on budget, and without the need for downtime.

ELECTRICAL NEW CONSTRUCTION EXPERTS

Every new construction project starts with designing an electrical plan capable of handling all the power needs for today and tomorrow’s technology.  We know technology is constantly advancing, which is why we help you understand what is necessary for today, as well as what is needed when preparing for upgrades in the future.  A perfect example of this would be considering smart commercial electrical services to increase efficiency.  Simply upgrading lighting and appliances can improve productivity and decrease power usage.

REMODEL AND NEW CONSTRUCTION SERVICES:

Fire Alarms & Security

Exterior Lighting

Energy-Efficient Lighting

LED Warehouse Lighting

Parking Lot Lighting

Security Lighting

Commercial Surge Protection

Power Supply Systems
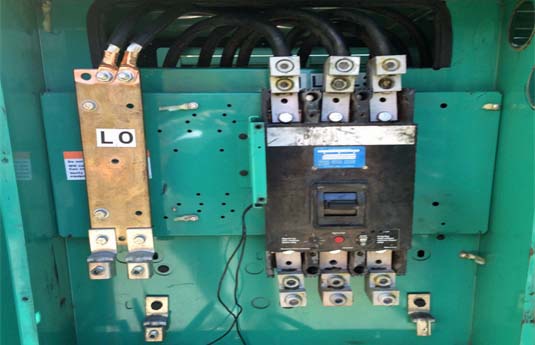
Commercial Panels

Backup Generators

Smart Lighting & Access Control


Remodels/Upgrades/Floor Heat

Remodeling a commercial space is a hefty project that requires extensive work. However, as you adapt, improve, or expand a building, you must consider updating the electrical system as well. will ensure that we install an electrical system that is up to current local code and prepared to handle the demands of your remodeling project. We’ve been assisting general contractors and builders throughout the areasince 2013 and are dedicated to providing quality service each and every time. We are a business, and we understand the importance of limiting any downtime and preserving your bottom line, which is why we work closely with you to complete all your electrical remodeling requirements on time and on budget.

Commercial Electrical Remodeling Services

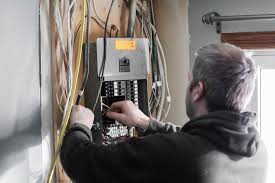
If the building that you’re remodeling suffers from frequently tripped breakers and other electrical problems, it could be because of faulty wiring. Our electricians can perform a thorough inspection to determine whether rewiring is necessary. If it is, we’ll rewire your entire building so that it is capable of handling the business’s electrical demands. During this time, we will also adapt new outlets and any other fixture installations, such as lights and ceiling fans, to the new wiring pattern. We will also disconnect and reconnect any machinery and can assist with all server room or IT needs.

When to Seek Out Commercial Electrical Upgrades

Even an expertly designed commercial electrical system would eventually need an upgrade to better handle the electrical demands of the building. Electrical upgrades are important because they improve the safety and functionality of a commercial or industrial space.

suggest getting commercial electrical upgrades when:

There doesn’t seem to be enough power for your daily activities and tasks

Your lights are constantly flickering or going out, especially when a large machine or appliance is turned on

Your equipment shuts off for no reason

You must run extension cords between circuits in an attempt to balance the load

Your breakers frequently trip when you try to run all your electrical devices at once

Your breakers fail and your equipment overheats

You notice your electrical panel or wiring contacts show signs of deterioration or corrosion

You notice melted wires or wiring insulation

You need surge protectors on every outlet

Even if you’re not experiencing any of these issues, it’s a good idea to consider an electrical system upgrade when you’re installing newer equipment so you can be sure it can handle the load. This is especially the case if you’re installing a new air conditioning unit or electric heating.


Electrical Remodeling Tricks, Tips, and Hacks

When it comes to minor electrical upgrades and remodeling projects, less is often more. That is, the less you can mess with the existing fixtures and wiring, the better. If something is unsafe or improperly wired, of course, you should replace it. But if you just need to add a light here, an outlet there, it can pay to look for ways to streamline the process. The following tips can help.

tend to think room by room, forgetting that an interior wall is nothing more than some framing and two layers of drywall (or plaster). Electrical wiring runs inside the walls and can be accessed from either side. So if you need to add an outlet (receptacle) to a room that has no nearby outlets, check the opposite side of the wall. If there’s an outlet (or a light switch) close by, you can cut a hole in the wall behind the outlet box to tap into the circuit. Just be sure you know what circuit you’re tapping into, and don’t exceed its safe load limit by adding a new outlet.

Sometimes ceiling lights aren’t where you want them to be. But you may find that you can move a ceiling light surprisingly far without adding more wire or running a new circuit. The electrical runs in your attic often have some room for movement. You can increase this by removing a few of the staples that secure the electrical cable to the framing. Be sure to re-fasten the cable with staples after you’ve moved the fixture.

non-permitted electrical work in residences isn’t uncommon. For small jobs, like adding an outlet, it’s likely that you don’t even need a permit to do the work. However, for more major electrical work, like adding new circuits or installing a subpanel, you most certainly will need a permit. And permits usually mean working with a licensed electrician.

However, in some areas, homeowners can legally do their own electrical work and get fully permitted and approved. The bar to this is a ​homeowner’s electrical exam. It’s not standard everywhere but is growing in use. A homeowner studies up for the test and pays a nominal fee. They then take a test consisting of 10 to 20 questions, usually at the permitting office. If you’re qualified to do the work yourself, you’ll save the cost of hiring a pro. If you’re not qualified, use an electrician.

New Electric Circuits Installation Services

Everything You Need to Know About GFCI Circuit Breakers

Ground Fault Circuit Interrupters (GFCIs)

A GFCI is a receptacle or circuit breaker and is used to increase safety in areas that are prone to the risk of electric shock. They will trip when current from the GFCI line side does not return through the neutral side. The GFCI measures the current from the line, through a load, and back to the neutral. This current needs to be the same. If current from the line does not return to the neutral (i.e. goes to ground instead), the GFCI will trip (power will be turned off coming out of the GFCI). It takes a mismatch of about 5 mA of current (5 milliamps or .005 A) to trip a GFCI.


Common GFCI Location Requirements

  • Unfinished basements
  • Kitchen countertops
  • Laundry, utility, and wet bar within six feet of a sink
  • Boathouses
  • Bathrooms
  • Garages and accessory buildings
  • Outdoors
  • Crawl spaces

Testing and Resetting a GFCI

When the test button is pushed or if the GFCI trips, power is shut off to the GFCI and protected receptacles. Pushing the reset button should restore power to the GFCI and receptacles connected to the GFCI load. If a GFCI has no power going to it (the GFCI line) then the test and reset button will not work. See Troubleshoot GFCI Receptacles. GFCIs should be tested about once a month. If it doesn’t trip when testing (but it has power to the line side), then it will need to be replaced.


Generally speaking, GFCI receptacles should be used when:

  • A circuit powers some receptacles that need GFCI protection and some that don’t
  • A receptacle is located far away from the panel box
  • You need few GFCI outlets and don’t want the expense of a high-quality GFCI breaker
  • Circuit breaker GFCIs are used as replacements for standard circuit breakers and provide GFCI protection to all receptacles on that individual circuit. The GFCI breaker can be built into or added onto your electrical panel and is typically a little larger and has its own test and reset buttons.

An entire circuit with a GFCI breaker can be used when:

  • Most or all outlets on a circuit need GFCI protection
  • Some outlet locations lack the space for bulky GFCI receptacles
  • You simply prefer the greater protection of the entire circuit
  • Specialty uses require a GFCI breaker, such as heated swimming pools
  • Operating a GFCI Breaker or Receptacle


Arc Fault Circuit Interrupter (AFCI)

If you’ve ever heard a buzzing noise when you turn a light switch, that noise is from wiring connections arcing. The arcing generates heat that could break down insulation around the wires, which could lead to an electrical fire. You should definitely look into fixing this issue immediately and install an Arc Fault Circuit Interrupter (AFCI) to prevent fire hazards.

ACFI uses advanced electronic technology to sense different arcing conditions. There are different technologies by different AFCI manufacturers to measure arcs but they all do the same thing. According to the NEC, AFCI senses line-to-line, line-to-neutral, and line-to-ground (parallel arcs). They could also sense arcing in series with one of the conductors (series arcs). AFCI protects the branch circuit wiring from arcing faults that could start an electrical fire.

AFCI

Another type or arc fault protection is the Combination AFCI breakers (CAFI), which is the combination of parallel and series arc fault protection. Like other arc fault interrupter, this helps protect against fire hazards from arcing of damaged electrical wiring. Square D is a manufacturer of CAFI breakers which have a white test button on them.

Special AFCI circuit breakers protect outlets and device in the circuit. But you can also install AFCI outlets if your circuit is not protected. The NEC doesn’t require AFCI protection on existing installations. However, if you’re extending or updating your circuit, the NEC requires you to install AFCI protection. AFCI is now mandatory in all circuits feeding living spaces such as kitchens, bedrooms, laundry, etc. It’s a good point to note, though, that not all jurisdiction follow the NEC, in this case it would be good to research if AFCI protection is required in your community.


How to Install a Ground Fault Breaker

A ground fault circuit breaker is properly called a ground-fault circuit-interrupter breaker, or simply a GFCI breaker. It installs into a home’s service panel, or breaker box, and provides GFCI protection for the entire branch circuit it serves. This installation is commonly used as an alternative to installing GFCI receptacles (outlets) in specific locations where they are required by the local electrical code. A GFCI breaker installs much like a standard single-pole circuit breaker, but there are some important differences to be aware of. Also, the new GFCI breaker must be the proper type and brand for the service panel.

Safety Warning About Service Panels

Installing a circuit breaker involves working near equipment carrying deadly levels of electrical current. While the main circuit breaker and all of the branch circuits in the service panel will be shut off for the GFCI breaker installation, the incoming conductors from the utility service and the lugs (terminals) where the conductors connect to the panel remain live at all times. Never touch the service lines or the lugs while working in the service panel.

Choosing the Right GFCI Breaker

Service panels and breakers are made by many different manufacturers, and panels and breakers are not universally compatible. When installing a new breaker, the breaker must be compatible with the brand and type of panel you have. Consult the breaker and/or panel manufacturer for recommendations.

The new breaker also must carry the appropriate voltage and amperage ratings for the circuit it will protect. Standard branch circuits are rated for 120 volts and either 15 or 20 amps. Circuits rated for 15 amps usually have 14-gauge wiring but may have 12-gauge wiring; both are permissible. A 15-amp circuit must be protected by a 15-amp breaker. Circuits rated for 20 amps must have 12-gauge or larger circuit wiring and must be protected by a 20-amp breaker. Never use a 20-amp breaker on a 15-amp circuit.

Difference Between Standard and GFCI Breakers

Both standard and GFCI breakers are single-pole breakers that occupy one slot on a service panel and connect to one “hot” circuit wire, usually a black wire. The main difference between the two types of breakers involves the neutral connection. With a standard breaker, the neutral circuit wire (usually white) connects to the neutral bus bar on the service panel; it does not connect to the breaker. With a GFCI breaker, the neutral circuit wire connects to the neutral terminal on the breaker. Most GFCI breakers also have a short, coiled, white neutral wire preinstalled on the breaker; this connects to the neutral bus on the panel.

Note: You must connect the hot circuit wire to the “hot” or “load” terminal on the GFCI breaker and connect the neutral circuit wire to the neutral terminal on the breaker. Mixing these up reverses the polarity of the circuit and may mean the breaker does not provide GFCI protection to the circuit—even if the breaker’s test button works normally.

Shutting Off the Power

The most important step for this project is shutting off the power to the service panel by switching off the main breaker. This turns off the power to the panel’s hot bus bars and to all of the branch circuits. It does not turn off the power to the utility service conductors coming in from the utility meter or the terminal lugs they connect to in the panel.

Is Starting A Career As An Electrician The Right Move For You

Steps on How to Become an Electrician

Electricians are in high demand. According to the Bureau of Labor Statistics, it’s projected those job opportunities will grow 14% between 2014 and 2024. Moreover, professionals who are trained in solar power and other alternative power sources will face a higher demand.

Taking advantage of this job growth requires a lot of hands-on experience and training.

  1. Research Duties

It’s important to know what’s required of you on the job. Electricians read blueprints to find the locations of outlets, panel boards, circuits, and other equipment. Afterward, you connect wires to transformers, switches and other components.

Electricians typically specialize in either construction to install systems, or in maintenance to upgrade existing systems.

  1. Take High School Courses

There are courses in high school that can help you prepare for an electrician career. These include algebra, physics, chemistry, workshop, geometry, and mechanical drawing.

If you’d like to create your own business, taking courses in business, entrepreneurship and accounting will also be helpful. Extracurriculars such as joining a high school electronics club, or volunteering for non-profit organizations would give you a leg up in your training.

  1. Earn a Certificate or Associate’s Degree

Certifications and associate’s degree programs are offered by community colleges and technical schools. The content in these courses addresses electrical theory, drafting, wiring techniques and the national electrical code.

Certificate programs can be completed in a year or less, while associate’s degrees can be earned in two years.

  1. Complete Industry-Sponsored Apprenticeship

Apprenticeships fully round out your knowledge. They include blueprint reading, safety guidelines, mathematics, electrical theory, and fire alarm safety.

Electrician training takes approximately four years to finish with 144 hours of classroom lessons. It’s required to have 2,000 hours of on-the-job training with an experienced electrician with tasks such as drilling holes, testing wires and installing conduit.

To find an industry-sponsored apprenticeship, it’s recommended to consult the Office of Apprenticeships Sponsors website. Apprenticeships are also available through organizations such as:

  1. The National Electric Contractors Association (NECA)
  2. The International Brotherhood of Electrical Workers (IBEW)
  3. Independent Electrical Contractors (IEC)
  4. Obtain a License

Most states require electricians to have a license. In order to find out if it’s necessary, you should contact your state’s local building official.

In many instances, you need to pass exams on the National Electrical Code, along with common electrical knowledge and theory. Once licensed, you’ll also need to continue to take continuing education courses. This enables you to stay up-to-date with National Electrical Code additions and amendments.


The Process

We’ve discussed the process on a few of our other posts, but it’s worth repeating. Your goal is to become a fully-licensed journeyman electrician. That takes a lot of work, and you’ve got a couple of different options:​

  • You can become an electrician helper, which is an entry-level position. A helper basically does menial tasks: he or she digs ditches, retrieves tools and parts, and does a lot of the busywork on a site. It’s an important position, but you will learn very little, and helpers are never promoted. You will, however, be getting paid, and more importantly, you’ll be getting some experience, which you can use to go to school or get an electrician apprenticeship. The good news: you can start right away and if you make connections and show your employer you’ve got potential, a job as a helper can lead to an apprenticeship.
  • You can go to an electrician school, graduate, and become an electrician’s assistant. The pay is better, and having a degree may help you get into an apprentice program. For more on schools, look at our “Find a School” tool. For more on apprentice programs, check out a few of the posts in the right sidebar—we’ve provided a lot of information on what apprenticeships are, why you’ll need one, and how to get one. The good news: a diploma or certificate looks good to employers.
  • You can skip electrician school and apply for an apprenticeship through the International Brotherhood of Electrical Workers (IBEW) or Independent Electrical Contractors (IEC) or Association Building Contractors (ABC). You’ll have to take an entrance exam and go through a few interviews. The test and the interviews can be challenging, so you want to be on your game. The good news: it takes a while to get started, but you’ll “earn as you learn” and get paid as soon as you start the apprenticeship.


Electrician School Requirements

If you decide to go to an electrician school before your apprenticeship, you’ll need to meet a few qualifications.

Every single school is different, but most require a high school diploma or GED… and that’s it!

Remember, technically, you don’t need to go to school to become an electrician. There are plenty of electricians who skip school entirely, and start an apprenticeship program. However, because it can be difficult to nab an internship, some people go to school to bulk up their resume, get some experience, and learn the math they’ll need to know to pass the apprenticeship exam.

What Else Should I Know?​

So, those are the technical requirements that are legally based. What about some of the “unofficial” requirements you’ll need to become an electrician? Let’s take a look.

  • People Skills. There are a lot times you’ll work alone as an electrician, but those times won’t occur very often during your apprenticeship. There is a lot of interaction both between the apprentice and his/her instructor, and the apprentice and whatever crew he/she is working with. Very often, those crews can be huge, so having basic people skills is pretty important.
  • Physical Ability. We’re not talking about brute strength—there are plenty of female electricians who don’t weigh much and are excellent electricians—but you need to be able to be on your feet all day. It’s a physical job, and a willingness to be in constant movement is necessary.
  • Problem Solving Skills. On every job you’ll ever take, there will be problems that pop up. If you’re an electrician for one day or for fifty years, you’ll always be encountering problems. Can you look at problems as challenges that need to be solved, and get to the bottom of things? If you can do that, you’ll be a VERY successful electrician.


Understanding The Different Levels Of Electricians

Electricians are divided into three separate groups including Apprentice, Journeyman and the highly coveted Master Electrician. Let’s look at each of these different levels and explain the difference between these highly skilled trades people.

Apprentice Electrician

An Apprentice electrician is an electrician just starting out. They work directly under the supervision of a Journeymen, and learn how to do very basic things including installing wiring, troubleshooting wiring problems, and installing entire electrical systems. They are able to work in industrial buildings, commercial buildings and also residential are

Journeyman Electrician

A Journeyman electrician works directly under a Master Electrician. This electrician is able to do everything and Apprentice electrician can do, but will make much more money per hour. They will have completed their apprenticeship and will be recognized by local, state and the national licensing body for the electrical trade.

Master Electrician

This is the highest level of electricians, requiring a minimum of seven years experience in this field. They must also pass an exam that will show that they have competency in this trade. They must learn the National Electrical Code, otherwise known as the NEC. These electricians are the highest paid in the industry, and will be in charge of all other electricians below them at job sites for which they are hired. Electricians can make a substantial amount of money every year, sometimes in excess of six figures depending upon the type of work that they do. It is a trade that will always have work available, regardless of where you live, and might be exactly what you’re looking for if you are seeking to learn a trade that will provide you with long-term income for years to come.


Is Becoming an Electrician Worth It?

Thousands of electricians enjoy their trade and the challenge of solving electrical problems. Hourly rates for electricians are expected to rise because there is an increasing demand for electricians.

Becoming an electrician is well worth the 4-year apprenticeship. You can make a good living. In fact, electricians are the highest paid of the skilled trades, with plumbers a close second. (Plumbers may have a higher wage in some areas). Electricians enjoy varied work with little chance of boredom. There is plenty of room for advancement as well.

Learn To Do About Ceiling Fans Installation

Do It Yourself: Ceiling Fan Installation

Installing a new ceiling fan is a thrifty way to reduce your energy bills without sacrificing comfort. A fan installation is a perfect weekend project for any avid do-it-yourselfer because it only requires a few hours to complete, and the payoff is immediate. You don’t have to be a home improvement expert to install a ceiling fan, Del Mar Fans & Lighting’s videos and instructions below can help you get started

RECOMMENDED TOOLS FOR INSTALLING A CEILING FAN

You have purchased the perfect ceiling fan – the right size, style, and finish, and are looking forward to basking under the gentle breeze. As you prepare to install the new ceiling fan, here are 10 basic tools to keep handy in your toolbox for any application. Having the right set of tools to install a ceiling fan guarantees a safe project and timely finish.

Crescent Wrench

Also known as an adjustable wrench, a crescent wrench has a set screw that adjusts the width of the wrench by moving one of the two jaws to the right or left. Use a crescent wrench to tighten a support brace or any bolts

Cordless Drill with Long Bit

Drills holes in various materials. Use a cordless drill to install the junction box or utility box to the ceiling joists

Voltage Tester

Also known as a test light, the tester consists of two leads that detect the presence of electricity in a fixture. Use a voltage tester when wiring a ceiling fan by placing one of the leads on the ground wire and the other lead on the hot wire to ensure there is no electricity running through these wires.


Ceiling Fan Tips

Save energy with fans

Ceiling fans provide a natural energy saving cooling solution. Most ceiling fans use only about as much power as a 60 watt light bulb which equates to less than 3 cents per hour to run.* Ceiling fans will save you money in utility bills in both the winter and summer months.

Outdoor areas

Fans located in outdoor areas should be protected from the elements, therefore are only recommended for outdoor rooms or alfresco areas. Outdoor fans must not be exposed to water under any circumstances and must have at least 2 walls of protection from wind

Ceiling Height

If you have ceilings above 3 metres, you may require an extension rod. All Beacon Lighting ceiling fans come with an optional extension rod, our standard size is 900mm but you can easily cut them to suit your requirements

Recommended Installation Height

Any ceiling fan should be at least 2.1 metres from the floor to the blades of the fan and at least 300mm from the ceiling.

Remote Controls

Have the convenience of being able to control the light and action of your fan from a remote control. Each Beacon Lighting fan can be installed with a receiver which means that when installing a fan into an existing light point there is no need to run an extra wire to control the fan, as the remote does everything for you. Remote controls are an optional extra.


Ceiling Fan Buyer’s Guide: How to Choose a Ceiling Fan

With such a broad range of fans to choose from, it’s easy to get lost in phrases like sloped-ceiling adaptable, blade span and 14-degree blade pitch. And all the questions: Big or small? How many blades? What controls do I need? Et cetera, et cetera.

There can really be a lot to think about when it comes to buying ceiling fans. So, if you want to brush up on all the technical jargon before making the wisest ceiling fan choice possible, you can do so here by checking out the following FAQs (plus, other ceiling fan articles, to your right).

What are my ceiling fan mounting options?

There are several options available, each designed to optimize air circulation and fit proportionally into a space. Regulations do require fans to be installed at least 7 feet up from the floor. (Before choosing a low-profile fan, be sure to measure the space between your ceiling and floor.) Aside from that, you can choose the fan mounting that best suits your room and, of course, your style.

Hugger Ceiling Fans

This type of flushmount ceiling fan is ideal for low ceilings (8 feet or shorter). There is no space between the ceiling fan’s motor housing and the ceiling, making it an ideal choice for smaller urban spaces, including apartments and condos.

Close-to-Ceiling Fans

A downrod of 3 to 5 inches is installed between the ceiling canopy and fan. The added space between the low profile ceiling fan and ceiling allows for more air circulation and fan efficiency, while remaining relatively close to the ceiling and out of the way. This mounting option is good for any room where the ceiling-to-floor height is roughly 9 feet.


How To Choose A Ceiling Fan – Size, Blades & Airflow

With so many variables and options, choosing the perfect ceiling fan and picking the right size can be a bit daunting. We’ve compiled some expert advice that will guide you through choosing a ceiling fan fit for your needs.

Determining what type of ceiling fan you should add to your room of choice can seem like a surprisingly complex decision when you are first starting out. You need to consider the dimensions of your room, the size of the fan, airflow and CFM, the length of its blades, how many blades, their materials, and more.

How do I choose a ceiling fan size that fits my room?

The first thing to consider when deciding your ceiling fan size is the size of the room in which it will go. The square footage of a room dictates how big the ceiling fan will need to be because a fan that is too small or big for a space will not circulate the air properly.

How do I determine the hanging height of the fan?

To meet building codes, the bottom of the fan should be at least seven feet off the floor; eight to nine feet will allow for optimal circulation. For higher ceilings, you can use fans with downrods, such as the Ball Ceiling Fan, to achieve the right height. The more space between the ceiling and the blades, the better for air flow and circulation. Ideally, aim for at least 12 inches

Fans will typically come with one or two downrods, in different standard lengths. However, if more length is needed to achieve the ideal hanging height, additional downrods in other sizes can be purchased. For a room with a 9-foot ceiling, select a fan with a 6” downrod. For ceilings that are taller than nine feet, add 6” to the downrod for every foot of height: 10-foot ceiling, 12″ downrod; 11-foot ceiling, 18″ downrod; and so on


How To: Choose a Ceiling Fan

Choosing a ceiling fan is enough to make any homeowner’s head hurt. With so many variables and options, what should you consider when choosing a ceiling fan

Get the Height Right

If  you’re planning the installation for a low-ceilinged room, insist on a flush-mount model (also called a “ceiling hugger”) to ensure adequate head clearance. For average-height ceilings, using the manufacturer-supplied hanging rod should do the trick. For higher ceilings, an extension rod will lower the fan to optimal position within the room, about eight or nine feet off the floor.

Size Your Fan to the Room

For very large rooms with high ceilings, fans with 60- to 80-inch blade spans are available. Large-sized fans are as much about scale as function in meeting the requirements of a large space

Place Your Fan Properly

Ceiling fans don’t actually lower room temperatures; they cool by creating a breeze. Install them in places where you spend the most time. Good spots are over the bed or above family-room or kitchen seating.

Consider Control Options

Do you want to control the fan from a wall switch, a remote, or a good old-fashioned pull chain? You may not have a choice. Mode of operation depends on the fan that you choose. Tastes vary, but there is certainly something to be said for the convenience of a remote that enables you to change fan speed (or ceiling-fan light fixture settings) effortlessly.

Tips To Learn How To Make Electrical Wiring

Common Electrical Wire Material Options

With so many  options available in the market, it is wise to always weigh your options and the exact wire features your kind of application require so you are able to select the most suitable one at the end of the day. It is the best way of ensuring safety when using electricity and wire materials are some of the most important to consider for any given application. What your wire is made up of determines its quality and suitability for the intended use.

Copper
It is considered standard in the wiring area with most electrical appliances relying on copper wires to transfer energy. One of the major reasons why copper is a great material is its high conductivity and flexibility. Compared to other metals, copper seems to win also in resistance to corrosion, tensile strength, ductility, thermal conductivity and also resistance to overloads. Because of the abundance of copper, the battery cable made of copper are reasonably priced.

Aluminum
It may be more abundant and cheaper compared to copper, but it is not as conductive as copper. You would need a relatively larger aluminum wire in diameter to have it functioning the same way as a copper wire. Aluminum is also not as reliable in terms of electrical safety because it can’t withstand excess heat. When going for this kind of electrical wire, especially for commercial purposes, it is best that you settle only for larger diameters.

Silver
It is a good conductor of electricity and is most suitable in high temperature conditions. Silver wires are however not that easy to bend and they can also be very expensive. In commercial applications, electrical safety would actually be compromised unless silver electrical wires are used. Most people prefer using these wires at home for their entertainment equipment because signals seem to travel far much better through pure silver compared to copper.


Tungsten

Tungsten is used when you actually want the wire to have resistance, and also have it not melt even when white-hot, as is the case in incandescent lamps.

Alloys
There are many different alloys used in electrical conductors. Here are some examples:

  • Nickel-chrome (nichrome) wire, like tungsten, can survive high temperatures, and the higher resistance is desirable. Being cheaper than tungsten, is used in heater wires, where the wire doesn’t need to get white-hot.
  • Solder, which is an alloy of tin and lead, or other mixes of metals in the case of lead-free solder, is used for bonding electrical components to copper pads on PCBs. The low melting temperature of tin-lead makes it suitable for this task.
  • Cryogenic wire is often phosphor bronze (copper, tin, phosphorus), where the resistance of this alloy doesn’t change much at very low temperatures.


Romex Cables

Romex (shown in yellow above) is the trade name for a type of electrical conductor with non-metallic sheathing that is commonly used as residential branch wiring. In fact, Romex will be the most common cable you’ll use in wiring a house. The following are a few basic facts about Romex wiring:

  • Romex ™ is a common type of residential wiring that is categorized by the National Electrical Code (NEC) as underground feeder (UF) or non-metallic sheathed cable (NM and NMC).
  • NM and NMC conductors are composed of two or more insulated conductors contained in a non-metallic sheath. The coating on NMC cable is non-conducting, flame-resistant and moisture-resistant. Unlike other cables commonly found in homes, they are permitted in damp environments, such as basements.
  • Underground feeder conductors appear similar to NM and NMC cables except that UF cables contain a solid plastic core and cannot be “rolled” between fingers.


Wiring Terminology

It helps to understand a few basic terms used to describe wiring. An electrical wire is a type of ­conductor, which is a material that conducts electricity. In the case of household wiring, the conductor itself is usually copper or aluminum (or copper-sheathed aluminum) and is either a solid metal conductor or stranded wire. Most wires in a home are insulated, meaning they are wrapped in a nonconductive plastic coating. One notable exception is ground wires, which are typically solid copper and are either insulated with green sheathing or uninsulated (bare).

UF Cable

Underground Feeder (UF) is a type of nonmetallic cable designed for wet locations and direct burial in the ground. It is commonly used for supplying outdoor fixtures, such as lampposts. Like standard NM cable, UF contains insulated hot and neutral wires, plus a bare ground wire. But while sheathing on NM cable is a separate plastic wrap, UF cable sheathing is solid plastic that surrounds each wire. UF cable is normally sold with gray outer sheathing.


The best wire for the job:

All electrical engineers must know about wires and think about using the right design and material for the task at hand. Here are the factors for determining wire design:

  • Durability (ability to flex repeatedly or be subject to crushing weights)
  • Voltage and Current level
  • Suspension strength (ability to hold its own weight over long spans between support)
  • Underground or underwater
  • Temperature of operation (like superconducting wire)
  • Cost

Solid Wire:

Advantages:
Less surface area to corrode
Can be rigid and strong
Disadvantages:
Not good if flexed repeatedly, can break if flexed in the same spot
Not practical for high voltage

Stranded Wire:

Above: Stranded speaker wire found in every household
Below: Specialized use super-thick stranded copper wire

Stranded wire

lots of smaller wires in parallel, can be twisted together

Advantages:
Great conductor for its size

Disadvantages:
You may think this would be good for high frequency use because it has lots of surface area on all the little strands of wire, however it is worse than solid wire because the strands touch each other, shorting, and therefore the wire acts as one larger wire, and it has lots of air spaces which makes for more resistance for the size

Braided Wire:

Advantages:

  • Great for durability compared with solid wire
  • Better conductivity than solid wire (lots of surface area)
  • Can act as an electromagnetic shield in noise-reduction wires
  • The more strands in the wire, the more bendable and strong it is, but it costs more
    Special Wires:

Solid with braided exterior or some combination of this, these wires are used for all kinds of special applications.
Coax cable is used for radio or cable television transmission because in its design braided and foil conductors on the outside keep frequencies trapped inside.  The shielding prevents stray electromagnetic energy from tainting the area around sensitive receivers.

Use New Electric Circuits For Your New Home

Electrical Outlet

Electrical outlets (also known as outlets, electrical sockets, plugs, and wall plugs) allow electrical equipment to connect to the electrical grid. The electrical grid provides alternating current to the outlet. There are two primary types of outlets: domestic and industrial. While not obvious from looking at them, the two sides of an electrical outlet represent part of a ‘loop of wire’ and plugging an electrical device into that outlet completes that loop, which allows electricity to flow through the device so it can operate


How an Electric Outlet Works

In order for electricity to work, it needs to create a circuit. An electrical outlet is the source of electrical power you use to plug in many of your appliances, which is how you create that circuit in your home. Here is how an electrical outlet works:

First, electricity is brought to your home by a power plant and power lines. This power is brought into your home and is distributed by a circuit breaker.

The circuit breaker is connected to each of your outlets by wiring.

An outlet has three holes. The first hole, or left hole, is called “neutral”. The second hole, or right hole, is called “hot”. The third hole is the ground hole. The hot hole is connected to the wire that supplies the electrical current. The neutral hole is connected to the wire that brings the electrical current back to the breaker box. When you plug in a lamp and turn it on, the hot part of the outlet allows electricity to flow into the lamp, turning on the light bulb. The circuit is completed when the current is brought back into the outlet through the neutral slot, and back into the circuit breaker. When you unplug the lamp the circuit is broken and thus the lamp doesn’t work.

A circuit breaker is one level of protection in a home. It’s called a circuit breaker because it will “trip” or “break” a circuit (stop electric current from flowing) if the electric current is too high. Another level of safety for your home’s electrical system is having a grounded wire and grounded outlets.


How to Replace an Electrical Outlet.

Materials

  • New electrical outlet

Tools

  • Wire strippers or scissors
  • Screwdriver

Instructions

  • Turn power to the outlet OFF.
  • Remove the face plate.
  • Unscrew and pull out the old outlet.
  • Remove wires from the old outlet.
  • Attach new outlet. White wire to silver, black wire to brass, Ground wire to grounding screw at back of box and then to green screw on outlet.
  • Gently push the outlet back into the box.
  • Screw the new outlet in place.
  • Attach new face plate.
  • Turn power back on and bask in the glow.


Where to get power

When you’re choosing which circuit to add on to, the ease of pulling the wire to the new receptacle will likely be the most important factor. Here are some acceptable options.

DO add on to these circuits:

  • General-purpose receptacle circuits in living areas, attics and unfinished basements.
  • Light switch and light fixture locations where un-switched 120-volt power is available.
  • Smoke detector locations.

You can’t add on to just any circuit in your house. Here are some circuits you definitely want to avoid.

DON’T add on to these circuits:

  • Dedicated kitchen, bathroom and laundry circuits.
  • Individual circuits for motor-operated appliances like garbage disposers, refrigerators, furnaces, dishwashers and trash compactors.
  • Circuits for specialty appliances like microwave ovens.
  • A box with too many wires.


You can use an electrical outlet when:

  1. If a switch or outlet is on a circuit that often blows its breaker or fuse, don’t make matters worse by adding yet another outlet to the circuit.
  2. Electrical codes restrict the number of lights or electrical outlets that can be connected to one circuit. Typically, you can have no more than eight lights or electrical outlets on a 15-amp circuit. To determine the amp rating of a circuit, just look at the number on its breaker or fuse in your main electrical panel. Turn off the circuit and test light switches and other outlets to determine exactly which lights or outlets are on a given circuit.
  3. Most electrical codes now require outlets in kitchens and bathrooms to be on separate 20-amp GFCI circuits. So before using the method we show here for how to wire a wall outlet in a kitchen or bathroom, check with an electrical inspector. If you add an outlet to a kitchen or bath, it must be GFCI protected. Don’t power your new outlet from a kitchen or bathroom outlet.
  4. Codes also limit the number of wires that can enter an electrical box or electrical receptacle, depending on the inside volume of the box and the gauge of the wires. The outlet-addition methods we show here are based on the most common wiring (14-gauge wire on a 15-amp circuit) and an 18-cu.-in. box (typical inside dimensions are about 2 in. x 3-1/4 in. x 3 in. deep). If the circuit is 20-amp—which means thicker, 12-gauge wire—or if the existing box is smaller than 18 cu. in., you can’t wire a new wall outlet as we show here unless you replace the existing box with a larger one. Plastic box sizes are stamped on the inside at the back.

Circuit Breakers Very Useful For Your Home Electronical

How Circuit Breakers Work

Circuit Breaker: At Work in Your Home

The power distribution grid delivers electricity from a power plant to your house. Inside your house, the electric charge moves in a large circuit, which is composed of many smaller circuits. One end of the circuit, the hot wire, leads to the power plant. The other end, called the neutral wire, leads to ground. Because the hot wire connects to a high energy source, and the neutral wire connects to an electrically neutral source (the earth), there is a voltage across the circuit — charge moves whenever the circuit is closed. The current is said to be alternating current, because it rapidly changes direction. (See How Power Distribution Grids Work for more information.)

The power distribution grid delivers electricity at a consistent voltage (120 and 240 volts in the United States), but resistance (and therefore current) varies in a house. All of the different light bulbs and electrical appliances offer a certain amount of resistance, also described as the load. This resistance is what makes the appliance work. A light bulb, for example, has a filament inside that is very resistant to flowing charge. The charge has to work hard to move along, which heats up the filament, causing it to glow.

In building wiring, the hot wire and the neutral wire never touch directly. The charge running through the circuit always passes through an appliance, which acts as a resistor. In this way, the electrical resistance in appliances limits how much charge can flow through a circuit (with a constant voltage and a constant resistance, the current must also be constant). Appliances are designed to keep current at a relatively low level for safety purposes. Too much charge flowing through a circuit at a particular time would heat the appliance’s wires and the building’s wiring to unsafe levels, possibly causing a fire.

This keeps the electrical system running smoothly most of the time. But occasionally, something will connect the hot wire directly to the neutral wire or something else leading to ground. For example, a fan motor might overheat and melt, fusing the hot and neutral wires together. Or someone might drive a nail into the wall, accidentally puncturing one of the power lines. When the hot wire is connected directly to ground, there is minimal resistance in the circuit, so the voltage pushes a huge amount of charge through the wire. If this continues, the wires can overheat and start a fire.

The circuit breaker’s job is to cut off the circuit whenever the current jumps above a safe level. In the following sections, we’ll find out how it does this.


Maintenance and Testing

 Circuit Breaker Maintenance and RepairWhen selecting a circuit breaker the user must decide to either buy a unit that is UL Tested (Underwriters Laboratories) or not. For overall quality assurance it is recommended that customer purchase circuit breakers that have been UL Tested. Be aware that non UL Tested products do not guarantee correct calibration of the breaker. All low voltage molded case circuit breakers which are UL listed are tested in accordance with UL Standard 489 which is divided up into two categories: factory testing and field testing.

  • UL Factory Testing: All UL standard molded case circuit breakers undergo extensive product and calibration testing based upon UL Standard 489. UL certified breakers contain factory sealed calibrated systems. The unbroken seal guarantees that the breaker is correctly calibrated and has not been subject to tampering, alteration and that the product will perform accordingly to UL specifications. If the seal is broken the UL guarantee is void as well as any warranties.
  • Field Testing: It is quite normal for data obtained in the field to vary from published information. Many users become confused to whether field data is flawed or published information is out of sync with their particular model. The difference in data is that test conditions in the factory vary considerably than in the field. Factory tests are designed to produce consistent results. Temperature, altitude, a climate controlled environment and using test equipment designed specifically for the product being tested all effect the outcome. NEMA publication AB4-1996 is an outstanding guide to infield testing. The guide gives the user a better variant of what are normal results for infield testing. Some breakers come with their own testing instructions. Where no instructions are present use a reliable circuit breaker service company.
  • Maintenance: For the most part, molded case breakers have an exceptional track record of reliability mostly due to the fact that the units are enclosed. The enclosure minimizes exposure to dirt, moisture, mold, dust, other containments and tampering. Part of proper maintenance is making sure that all terminal connections and trip units be tightened to the proper torque value as set by the manufacturer. Overtime these connections will loosen and need to be retightened. Breakers also need to be cleaned regularly. Improperly cleaned conductors, the wrong conductors used for the terminal and loose terminations are all conditions that can cause excessive heating and weakening of the breaker. Breakers that are manually operated require only that their contacts are clean and that the linkages operate freely. For circuit breakers that are not used on a regular basis an intermittent startup of the breaker is required to refresh the systems.

As always, it is best to consult a certified electrician to determine exactly what type of circuit breaker is right for your generator application. The factors influencing the safe and proper operation of a power generator and a circuit breaker vary from site-to-site and only a licensed professional can specify the right equipment.


Types of Electric Circuit

There are following 5 main types of electric circuit:

  1. Close Circuit

When load works on its own in a circuit then it is called Close Circuit or Closed Circuit. Under this situation, the value of current flow depends on load.

  1. Open Circuit

When there is a faulty electrical wire or electronic component in a circuit or the switch is OFF, then it is called Open Circuit. In the below diagram you can see that the Bulb is Not glowing because either the switch is OFF or there is fault is the electrical wire.

  1. Short Circuit

When both points (+ & –) of voltage source in a circuit gets joint with each other for some reason then it is called Short Circuit. Maximum current starts to flow under this situation. Short circuit generally happens when the conducting electrical wires get joint of even because of shorting in the load.

  1. Series Circuit

When 2 or more loads (Bulb, CFL, LED, Fan etc) are connected to each other in a series, then it is called a Series Circuit. In a series circuit, if one load or bulb gets fuse, then rest of the bulbs will not get power supply and will not glow. Look at the example below.

  1. Parallel Circuit

When 2 or more loads (Bulb, CFL, LED, Fan etc) are connected to each other in parallel, then it is called Parallel Circuit. In this type of circuit, the voltage capacity of all loads must be equal to input supply. Power of “load” can be different. In a parallel circuit, if one load or bulb gets fuse, then rest of the bulbs will still get power supply and will glow. Look at the example below.


How to Turn on a Circuit Breaker

At one time or another, you’ve had to turn on a circuit breaker. It’s also likely you’ve had to turn one off to replace a switch or outlet, or possibly to put up a new light or ceiling fan. Circuit breakers vary from brand to brand but have the same amperage ratings. In any case, turning a circuit breaker on is so easy, as the Geico commercial touts, that a caveman could do it.

Circuit Breakers and Electrical Safety

Electrical safety always begins with turning a circuit breaker off before performing any electrical work on a circuit or device connected to it. You may say it ends when the project is completed and the circuit breaker is once again re-energized by turning the circuit breaker back on.

You can usually see right away if there is a problem ​by going to the electrical panel and checking for a tripped circuit breaker. Simply open the electrical panel door and search the breakers one by one from top to bottom in both rows of breakers, until you find the troubled circuit. Once located, tape it off so that no one else tries turning on the circuit while you’re working on it. It’s just another safety move that works.

Using a Circuit Breaker

 Circuit breakers are no more than a specialized single-pole switch, the difference being it has three states it can be in: off, on, or tripped (a sort of neutral position). Unlike a switch that is either on or off, the breakers tripped position is a state that allows the homeowner to see that a circuit error has occurred.

To turn on a circuit breaker, simply locate the circuit breaker panel in your home or office. On the face of the panel, you’ll see a door. Open that door and there will be many black circuit breakers with switch handles. These breakers will look wider than taller and most of them are black in color. The switches will be stacked in two rows from top to bottom. On each breaker should be a small window that will show red if the circuit breaker trips. The window is clear when all is well but it will show red when the breaker has tripped.

The breaker switch handles are in the on position when the handles are towards the center of the breaker panel. If they are positioned toward the outside of the panel, they are in the off position. The tripped state will be somewhere in the middle with the window showing red. To reset this state, you’ll need to switch off the breaker before turning it back on.

Be sure to find out what caused the tripped state before resetting the breaker. After fixing the problem, you are ready to check the circuit out by resetting the breaker. If the fault clears, you have indeed corrected the problem. If not, you’ll have to find out where the problem is and continue the steps.

Turning them on is no big deal, but you may want to practice a time or two just in the event you ever have to either reset a tripped breaker or turn one on. That way, you’ll be familiar with what a circuit breaker does and how they function as a disconnect switch.


 HOW MANY TIMES SHOULD I RESET A TRIPPED CIRCUIT BREAKER?

Well, the answer is, it depends. In general, the answer is you should NOT reset a circuit breaker, unless you know the cause and that cause does not pose a hazard. Circuit breakers are there to protect you, your family, and your home. If a circuit breaker trips, it means there is more current flowing through that circuit breaker than its trip current. So, you must be able to absolutely determine what is causing the excess current through a circuit breaker.

For example, if a 15 Amp circuit breaker trips, it means you have more than 15 Amps of current flowing through that breaker. Now, if you happened to plug in several appliances to that circuit AND you know the draw of the total of those appliances is greater then 15 Amps, then, and only then should you reduce the load on that circuit (unplug things), reset the breaker – only once.

However, most trips of a circuit breaker cannot be isolated that easily. Wiring, like everything else, ages. The insulations’ ability to resist the voltage becomes less and less. Finally, the insulation breaks down and presto – an electrical short. Electrical shorts allow lots of electrons to pass very quickly through the degraded insulation. It’s very much like a pipe that leaks – eventually it can flood your home. Only, in this case, the shorted wire(s) heat up and can burn down your home.

The circuit breaker is your safety valve. But, there’s another inherent and more insidious danger. Circuit breakers, like the wiring in your home, age. In the case of aged circuit breakers, it’s not so much that they trip prematurely, but that they do not trip at all.

Old wires and old circuit breakers are a recipe for catastrophic failure and a fire. In our hot desert environment, circuit breakers have a useful life of approximately 25 years. After that, they must be replaced. Replacing circuit breakers is known as an “Electrical Panel Rejuvenation.”

The moral of all of this, if you are not absolutely sure you’ve unintentionally overloaded a circuit and corrected the overload, DO NOT reset that circuit breaker. Call Eavenson Electric for a safety assessment. We will assure your breakers are functioning properly. If there is a problem, we can correct any faulty wiring or failed circuit breakers.