Things You Should Not Put Down The Garbage Disposal
Let’s be honest, we love our garbage disposals. It’s a quick and sanitary way to dispose of food waste, keeping your trash cans cleaner and lighter — and it helps keep your food waste out of the landfill! Garbage disposals can get overworked between all the food we throw down them, and even the newer models have a simplistic construction that can get overrun. While we all know that you shouldn’t put grease or oil down our drains, there are certain foods that aren’t great for your disposal. These types of foods can cause clogs and overwork the disposal, causing you to have to replace them, which is time consuming and an expense you won’t want to cover if you can avoid it. So, let’s take a look at some things you should avoid putting down your garbage disposal
Coffee Grounds
For a long time there has been a common misconception that putting coffee grounds down your disposal is a great way to help dispose of any odors that might be arising from your sink. However, while the scent of coffee can help mask certain food odors, coffee grounds can actually cause you more harm than help. When coffee grounds are taken out of the filter and thrown down the drain they can turn into a thick, dense paste-like substance that can build up over time and eventually lead to a clogged drain. Instead of throwing coffee grounds down to clear out smells, try thinly sliced citrus rinds.
Pasta
It doesn’t take a scientist to understand that pasta expands when it’s soaked in water. And with that thought, it’s best that you don’t put pasta down the garbage disposal. You may think that if it’s being ground up, what’s the issue? Well, even when its ground up, these pieces of pasta will still expand when they’re around water, meaning they can expand over time and take over your disposal. A few noodles won’t hurt anything, but we don’t recommend throwing that entire pasta casserole down your disposal.
Onion Skins
If you’re cooking with onions, the actual vegetable can be put down the drain, but we recommend that you save the skins for the trash can. The problem with onion skins is that they can get stuck on the blades and then act like a net and catch and hold on to other food particles. Not only does this lead to a smelly sink, but it also creates a barrier between the blades, causing them to get jammed up. Save yourself the time and money by just taking a few extra steps to the trash can; it’s a few seconds of effort that can save hours of work or an expensive visit from a plumber.
Pits
Peaches, avocados, and cherries are all some of our favorite foods, but they have extremely hard pits that can dull and break the blades of your disposal. A good rule of thumb is: if you can’t cut it with a knife, you shouldn’t put it down the drain. Don’t panic if you accidentally drop a small pit down the drain, but you won’t want to make it a routine habit
Need to get rid of food waste? Here are the best garbage disposals
With most of us spending more time at home and in the kitchen, trash is piling up. A good way to de-funk things is to put less garbage in the can by using a disposal.
Consumer Reports says a good garbage disposal pulverizes your food waste so that you can simply rinse it away. It just finished testing models that should make cleaning up your kitchen a lot easier
In Consumer Reports labs, testers put garbage disposals through rigorous challenges. To assess grinding performance, for example, testers measure equal amounts of bones and vegetable pieces to run through each garbage disposal.
The lower-scoring disposals leave larger scraps that could potentially block your drain. Consumer Reports also test for noise, measuring decibel output while the disposals grind a mix of bones and vegetables.
It earns an Excellent rating for grinding scraps, but it’s louder than other disposals tested. Some people prefer batch-feed disposals because they can’t be turned on until you load the chamber with waste and insert a stopper.
GARBAGE DISPOSAL DO’S, DON’TS, ISSUES AND RECOMMENDATIONS
At the risk of stating the obvious, a garbage disposal is a device, usually electrically powered, installed under a kitchen sink between the sink’s drain and trap. The disposal unit shreds food waste into pieces small enough—generally <2 mm—to pass through plumbing. About 50% of homes in the US have garbage disposals; food scraps range from 10% to 20% of household waste.
A high quality garbage disposal will love grinding for about 10-12 years, depending on what you put in it and how well you take care of it. Estimated life also is dependent on the quality of the unit itself. A good 2/3 HP or 3/4 HP, with lots of stainless steel (particularly the entire grind chamber) is optimal. If you cheap out on a 1/4 HP or 1/3 HP model and overuse it, don’t expect the disposal to last very long.
What NOT to Grind
What NEVER to put in your garbage disposal: asparagus, artichoke leaves, banana skins, celery, chicken bones, coffee filters, cooked rice, egg shells, grease, green onion tops, onion skins, potato peels, shrimp shells, tea bags. Some items damage the appliance (bones), plug the drain piping (banana peels), or load up the local waste water utility.
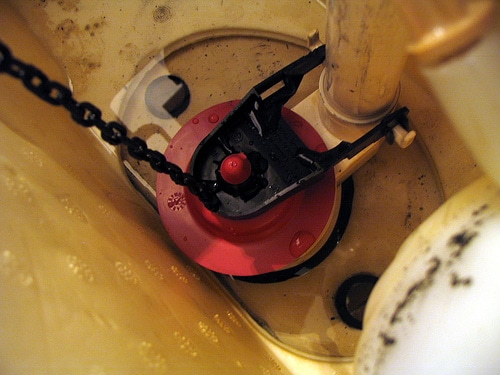
Dead Disposal? All May Not Be Lost
Make sure the disposal switch is OFF.
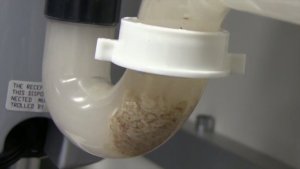
Common Issues and Recommendations
We inspect thousands of garbage disposals every year. When our inspectors find an issue with a garbage disposal, it’s usually one of the following four:
The garbage disposal is leaking.
The splash guard is missing or deteriorated.
The wire clamp is missing.
The garbage disposal is excessively corroded.
What Not To Put in a Garbage Disposal
InSinkErator garbage disposals are designed to handle just about any type of everyday food waste. But the topic of what not to put in a garbage disposal is alive and well, usually based on myths and old family stories rather than facts.
First things first, never place any type of fats, oils, grease in a garbage disposal, or down a sink drain for that matter. Those materials collect inside the plumbing pipes and are usually the cause of many plumbing issues.
Household Foodwaste
InSinkErator disposals can quickly and efficiently grind most everyday food wastes, including leftover meats, vegetables and fruits, as well as food preparation waste. The key to keeping a disposal working properly is to follow the proper operation steps and avoid filling the disposal with too much food waste at one time.
Coffee Grounds and Eggshells
There is often the question of using a disposal for eggshells and coffee grounds. In fact, neither of these materials is harmful to a disposal, and will pass through it without a problem. However, problems can arise with household plumbing – especially if it is older, or has not been cleared in some time.
Both coffee grounds and eggshells are sedimentary in nature, if too much is placed in at one time, or if the plumbing is restricted, it can create a clog or a ‘slow drain’ situation. Too help avoid any problems, feed these materials into the disposer gradually, and utilize a strong flow of cold water to help flush it through the pipes.
GARBAGE DISPOSAL DO’S AND DON’TS TIPS
TIPS ON WHAT TO PUT DOWN YOUR GARBAGE DISPOSAL
Below are some tips about what you can put down your garbage disposal, and what should not be put into the garbage disposal and the sanitary sewer system. These tips help protect you and the environment too!
DO’S
Do minimize the use of the garbage disposal. If you are able to compost vegetable waste at your home, you can dispose of material like vegetable peels, cuttings, stems, seeds, and coffee grounds by composting. Composting allows you to convert these waste items into a valuable soil amendment that you can use in your garden
Do dispose of liquid materials in the garbage disposal, if they are not hazardous or made of primarily fats or oils. Do dispose of solid items that cannot be composted in the trash. Do dispose of non-compostable items in the trash, instead of sending them down garbage disposal, where they must go to the Wastewater Treatment Plant and be removed through the water treatment process
DON’TS
Don’t put fats, oil and grease down the drain or in the garbage disposal. These materials (known as FOG) solidify in the sewer and cause blockages and sewer overflows. Materials like bacon grease, oil, and other fats should be poured into an empty metal can and allowed to cool and solidify. Then you can dispose of the can in the trash. If there is a small amount of oil or grease in the pan, you can wipe the pan out with a paper towel to remove the grease before washing. Find out more about FOG and how to prevent backups.
Don’t put hazardous materials, such as paint, unneeded medicine, motor oil, pesticides, solvents, and other cleaners, down the garbage disposal.