Do It Yourself: Ceiling Fan Installation
Installing a new ceiling fan is a thrifty way to reduce your energy bills without sacrificing comfort. A fan installation is a perfect weekend project for any avid do-it-yourselfer because it only requires a few hours to complete, and the payoff is immediate. You don’t have to be a home improvement expert to install a ceiling fan, Del Mar Fans & Lighting’s videos and instructions below can help you get started
RECOMMENDED TOOLS FOR INSTALLING A CEILING FAN
You have purchased the perfect ceiling fan – the right size, style, and finish, and are looking forward to basking under the gentle breeze. As you prepare to install the new ceiling fan, here are 10 basic tools to keep handy in your toolbox for any application. Having the right set of tools to install a ceiling fan guarantees a safe project and timely finish.
Crescent Wrench
Also known as an adjustable wrench, a crescent wrench has a set screw that adjusts the width of the wrench by moving one of the two jaws to the right or left. Use a crescent wrench to tighten a support brace or any bolts
Cordless Drill with Long Bit
Drills holes in various materials. Use a cordless drill to install the junction box or utility box to the ceiling joists
Voltage Tester
Also known as a test light, the tester consists of two leads that detect the presence of electricity in a fixture. Use a voltage tester when wiring a ceiling fan by placing one of the leads on the ground wire and the other lead on the hot wire to ensure there is no electricity running through these wires.
Ceiling Fan Tips
Save energy with fans
Ceiling fans provide a natural energy saving cooling solution. Most ceiling fans use only about as much power as a 60 watt light bulb which equates to less than 3 cents per hour to run.* Ceiling fans will save you money in utility bills in both the winter and summer months.
Outdoor areas
Fans located in outdoor areas should be protected from the elements, therefore are only recommended for outdoor rooms or alfresco areas. Outdoor fans must not be exposed to water under any circumstances and must have at least 2 walls of protection from wind
Ceiling Height
If you have ceilings above 3 metres, you may require an extension rod. All Beacon Lighting ceiling fans come with an optional extension rod, our standard size is 900mm but you can easily cut them to suit your requirements
Recommended Installation Height
Any ceiling fan should be at least 2.1 metres from the floor to the blades of the fan and at least 300mm from the ceiling.
Remote Controls
Have the convenience of being able to control the light and action of your fan from a remote control. Each Beacon Lighting fan can be installed with a receiver which means that when installing a fan into an existing light point there is no need to run an extra wire to control the fan, as the remote does everything for you. Remote controls are an optional extra.
Ceiling Fan Buyer’s Guide: How to Choose a Ceiling Fan
With such a broad range of fans to choose from, it’s easy to get lost in phrases like sloped-ceiling adaptable, blade span and 14-degree blade pitch. And all the questions: Big or small? How many blades? What controls do I need? Et cetera, et cetera.
There can really be a lot to think about when it comes to buying ceiling fans. So, if you want to brush up on all the technical jargon before making the wisest ceiling fan choice possible, you can do so here by checking out the following FAQs (plus, other ceiling fan articles, to your right).
What are my ceiling fan mounting options?
There are several options available, each designed to optimize air circulation and fit proportionally into a space. Regulations do require fans to be installed at least 7 feet up from the floor. (Before choosing a low-profile fan, be sure to measure the space between your ceiling and floor.) Aside from that, you can choose the fan mounting that best suits your room and, of course, your style.
Hugger Ceiling Fans
This type of flushmount ceiling fan is ideal for low ceilings (8 feet or shorter). There is no space between the ceiling fan’s motor housing and the ceiling, making it an ideal choice for smaller urban spaces, including apartments and condos.
Close-to-Ceiling Fans
A downrod of 3 to 5 inches is installed between the ceiling canopy and fan. The added space between the low profile ceiling fan and ceiling allows for more air circulation and fan efficiency, while remaining relatively close to the ceiling and out of the way. This mounting option is good for any room where the ceiling-to-floor height is roughly 9 feet.

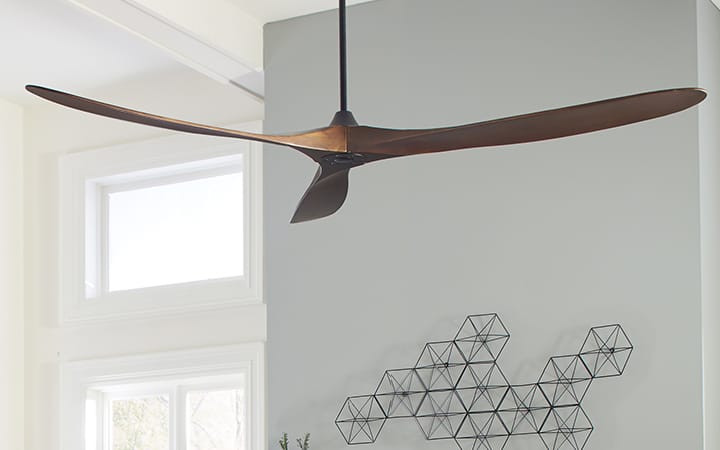
How To Choose A Ceiling Fan – Size, Blades & Airflow
With so many variables and options, choosing the perfect ceiling fan and picking the right size can be a bit daunting. We’ve compiled some expert advice that will guide you through choosing a ceiling fan fit for your needs.
Determining what type of ceiling fan you should add to your room of choice can seem like a surprisingly complex decision when you are first starting out. You need to consider the dimensions of your room, the size of the fan, airflow and CFM, the length of its blades, how many blades, their materials, and more.
How do I choose a ceiling fan size that fits my room?
The first thing to consider when deciding your ceiling fan size is the size of the room in which it will go. The square footage of a room dictates how big the ceiling fan will need to be because a fan that is too small or big for a space will not circulate the air properly.
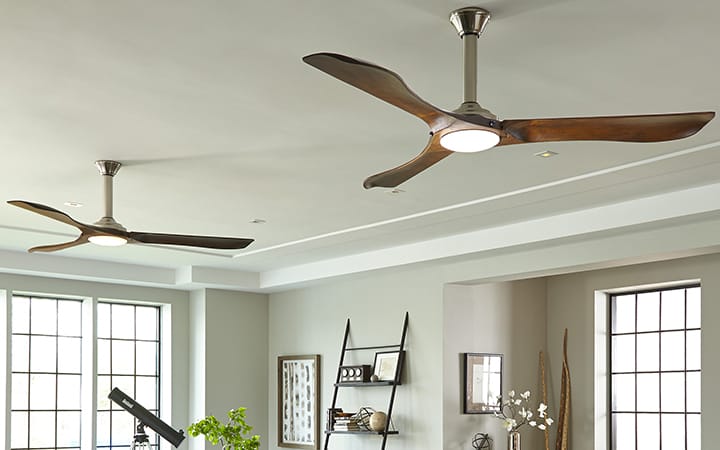
How do I determine the hanging height of the fan?
To meet building codes, the bottom of the fan should be at least seven feet off the floor; eight to nine feet will allow for optimal circulation. For higher ceilings, you can use fans with downrods, such as the Ball Ceiling Fan, to achieve the right height. The more space between the ceiling and the blades, the better for air flow and circulation. Ideally, aim for at least 12 inches
Fans will typically come with one or two downrods, in different standard lengths. However, if more length is needed to achieve the ideal hanging height, additional downrods in other sizes can be purchased. For a room with a 9-foot ceiling, select a fan with a 6” downrod. For ceilings that are taller than nine feet, add 6” to the downrod for every foot of height: 10-foot ceiling, 12″ downrod; 11-foot ceiling, 18″ downrod; and so on

How To: Choose a Ceiling Fan
Choosing a ceiling fan is enough to make any homeowner’s head hurt. With so many variables and options, what should you consider when choosing a ceiling fan
Get the Height Right
If you’re planning the installation for a low-ceilinged room, insist on a flush-mount model (also called a “ceiling hugger”) to ensure adequate head clearance. For average-height ceilings, using the manufacturer-supplied hanging rod should do the trick. For higher ceilings, an extension rod will lower the fan to optimal position within the room, about eight or nine feet off the floor.
Size Your Fan to the Room
For very large rooms with high ceilings, fans with 60- to 80-inch blade spans are available. Large-sized fans are as much about scale as function in meeting the requirements of a large space
Place Your Fan Properly
Ceiling fans don’t actually lower room temperatures; they cool by creating a breeze. Install them in places where you spend the most time. Good spots are over the bed or above family-room or kitchen seating.
Consider Control Options
Do you want to control the fan from a wall switch, a remote, or a good old-fashioned pull chain? You may not have a choice. Mode of operation depends on the fan that you choose. Tastes vary, but there is certainly something to be said for the convenience of a remote that enables you to change fan speed (or ceiling-fan light fixture settings) effortlessly.