WHAT’S THE BEST WAY TO GET RID OF ANTS FOR GOOD?
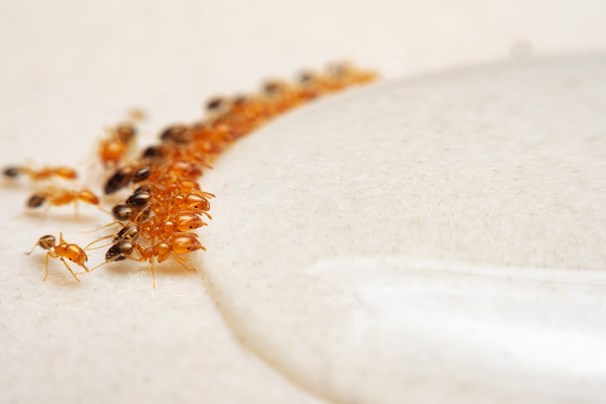
Have you noticed that they seem a lot more active in summer? That’s because they are. Ants have the equivalent of a great work ethic come summertime. And it does make sense – it’s for their own livelihood. Ants must forage and store enough food in the summer months to keep them going through the cooler months. And like any good team member, when they hit a jackpot, they send out the word and an entire ant army comes a running. That’s why there is never just one ant – there are hundreds of them.
How do you keep ants out of your home and kitchen?
You may have noticed that ants love your kitchen and bathroom the most. It makes sense really as these areas have the sustenance they need for life – food and water. Cupboards chock full of tasty treats, floors with dropped food and bathrooms with an abundance of water drops perfect for a thirsty ant. Here’s some simple home remedies to try and combat those ants before they take hold.
Clean as you go
Clean as you go, so no leftover food is left on your kitchen benches. Clean out your cupboards and store food in containers and ziplock bags to prevent things like sugar spilling out and creating a sugary feast for your ant invaders.
Baby powder and coffee granules scare them off
Sprinkle some baby powder across the entry areas that your ants like to travel. They don’t like walking across it so baby powder up those surfaces! May be messy for a while but will do the trick. Coffee granules do the same however this may prove a bit more unsightly!
Pet Food Bowls – make a moat
Often a common party scene for ants as food can sit for longer periods of time as well as linger in the bowl even when licked clean. Simply pop your food bowl into another bowl filled with water – those ants won’t swim!
How to get rid of ants
ants are about as common as kookaburras and kangaroos. They play a crucial part in your garden’s ecosystem but inside the house can wreak havoc, finding their way into just about everything. Here we discover the best natural and not-so natural ways to get rid of ants.
Types of ants
home to lots of pests and critters and a plethora of ants, some of the most popular types of ants are:
Carpenter ants
Fire ants
Bull ants
Sugar ants
Black Ants
Argentine ants
Pharaoh ants
Red Ants
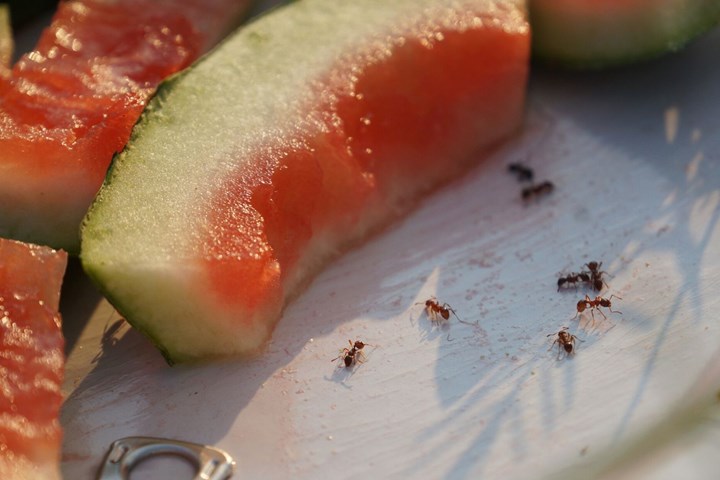
Don’t feed ‘em
First things first, if you want ants to stay away permanently don’t leave a buffet of sugary and fatty food out. Keep your home free of crumbs and food scraps and keep as much as you can in sealed containers. This isn’t a foolproof method but it will cut down their numbers inside your home.
Get them at the source
Here’s a simple and natural way to exterminate ants in one go.
Find the ants nest and using a small spade make a hole in the centre.
Pour boiling water into the hole, repeating until no more ants surface from the nest.
Homemade bait
Finding the ants manor is often easier said than done, so if you can’t find the source you could look at making your own ant trap.
How to Keep Ants Out of the House
It is ant season again! As soon as the weather starts to heat up, and particularly after a warm rainy day, ants decide that indoors is a good place to be. Sure, you can kill ants with various home remedies, but are there are lots of other things that you can do to keep ants out of the house? Fortunately, the answer is YES!
What attracts ants in the first place?
If you want to keep ants out of the house, one of the first things you need to know is what attracts them into the home. Just like any other creature, ants search for food and water, and also a shelter of some sort.
There are many types of ants and not all of them are attracted to the same thing. Generally speaking though, ants like organic matter of some sort of sweetness. That means that anything from kitchen scraps to a spilled bit of honey will bring them inside. Even old cut flowers in water in a dirty vase can attract them.
All it takes is one ant! If you see a single ant on your counter top and don’t consider it a big problem, think again. If that guy finds a food supply, he’ll go back to his nest to tell his buddies and you’ll be seeing more of them soon.
As soon as an ant finds a food source, he will carry tiny bits of it back to the nest and mark the trail to the food source with pheromones to show other ants how to find the food supply. Squish that ant in his tracks!

WHAT MAKES THESE ANTS SO SUCCESSFUL?
Social organisation is one of the key factors that contributes to the success of ants as invaders. Their advanced social system has gifted them a number of unique ways that enhance survival and success. These benefits includes group protection against predators, organised resource exploitation, aggressive colony defence and buffering against environmental changes.
Colonies have many queens
Typically, an ant colony consists of a single fertilized female (the queen) attended by her daughters, which are sterile female workers.
From time to time, winged (alate) males and females are produced. These males and females normally leave the nest to mate and start new colonies. Invasive ants often have multiple queens per colony (polygyny), which increases reproductive output and leads to larger colony size.
Queen ants are responsible for all reproduction in the colony. The number of queens is an important factor in the problems invasive species cause, because usually the more queens there are, the more workers there are and the worse the problem is.
An extreme example of polygyny is the little fire ant. In its invaded range, this species can be present in extraordinary densities of more than 220,000,000 individuals per hectare. And as many as 550,000 queens per hectare or 55 queens per square meter!
Fire Ant Frequently Asked Questions
What are red imported fire ants? What makes them different
Red imported fire ants or Solenopsis invicta are medium-sized red and black colored ants that build mounds of soft soil. Mounds are rarely larger than 18″ in diameter. In cold, dry areas such as the High Plains
mounds are usually much smaller and harder to detect. When disturbed, fire ants emerge aggressively, crawling up vertical surfaces, biting and stinging “all at once”. Their sting usually leaves a white pustule on the skin. Worker fire ants vary in size from small (1/16 inch) to large (almost ¼ inch) in length. Many native ant species have worker ants that are uniform in size and may vary in body color. Other small to medium-sized ants that build small nests in soil often have central nest openings through which the ants enter and leave whereas fire ants mounds have no central openings.
Harvester ants are much larger and make large bare areas with a single entrance hole to the colony.
Leafcutter ants are also much larger and have a distinctive built-up dense cluster of mounds at the colony’s center called a “town”, and have many entrance holes over a very large area.
Can I tell the difference between fire ants and native ants? How large are fire ants?
Some uncertainty comes from the fact that red imported fire ants vary in size (1/16 to almost 1/4 inch long – see image by S. D. Porter, USDA-ARS), with the largest workers 2 or 3 times larger than the smallest. Red imported fire ants are an exotic invasive species and in many areas