A Beginner’s Guide To Basic Open Water Testing

Well ​Water Testing

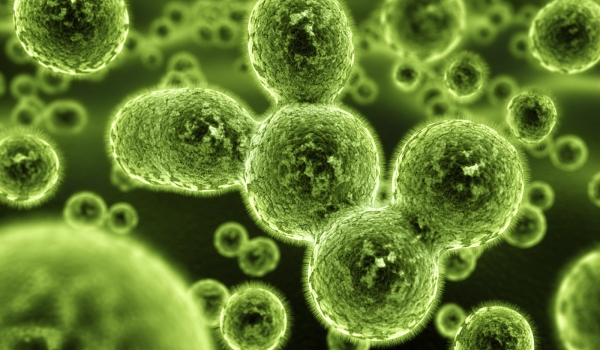
Water samples are tested for two types of bacteria: total coliforms and E. coli.

Total coliforms. These bacteria are often found in animal waste, sewage, soil and vegetation. If they are in your drinking water, it means contaminated surface water may be entering your well.

coli (Escherichia coli). These bacteria are normally found only in the digestive systems of people and animals. If they are in your drinking water, it usually means that animal or human sewage waste is entering your well from a nearby source.

If these bacteria are in your water, they could cause illness such as stomach cramps, diarrhea, and other symptoms, which can lead to additional health concerns. All private well owners are encouraged to get their water tested every spring, summer and fall, even if it looks, tastes and smells fine.

We also recommend that you test your water:

After any repairs to your well;

If your well hasn’t been used for several weeks;

If there is flooding in the area; or

If you notice a change in your water (e.g. smell, taste or colour).

Whether your test results are positive or negative, it is important to understand that the sample you collected is just a “snapshot” of your well’s water quality. The more samples you have tested, the more confident you can be about the quality of the water you and your family are drinking.

In addition to regularly testing well water, owners should inspect their well at least once a year to make sure it is free from damage and in good working condition.

The lab will only accept water samples taken directly into the proper water testing bottle. The sample should only be taken from an indoor drinking water tap, from a kitchen or bathroom.

Wash hands before taking the sample.

Remove screen, aerator or other attachments from kitchen faucet.

Clean end of the faucet with an alcohol swab or diluted 5.25% bleach solution

[1 part household bleach to 10 parts water = 50 mL (1/4 cup) bleach to 500 mL (2 cups) water or 10 mL (2 tsp) bleach to 90 mL (6 tbsp) water]

Run cold water for at least five minutes.

Keep sample bottle closed until the moment you are ready to fill it.

Remove the bottle cap and hold the cap between the fingers, not touching the inside or setting it down to touch a surface (like the counter).

Do not touch the inside of the bottle or rinse the bottle out since it contains a preservative for transporting.

Hold the bottle near the bottom and fill to the 200 mL fill-line (maximum amount) and recap immediately.

Keep the blue card and attach one barcode sticker from the bottle, for your records; you will need this code if you wish to call the lab for your results.

Put your name on the label found in the bag that came with the bottle, attach it to the bottle, then place the completed form back into the plastic bag provided, and attach it to the bottle with the elastic.

Transport samples to the drop-off locations within 24 hours of taking the sample. Your water sample should not be left sitting for a long period of time as this can lead to inaccurate results. Samples must be kept cold after sampling. If you are transporting samples on a hot day, keep in a cooler with an icepack or bag of ice.
 

Water Testing

Testing Your Well Water

Test your well water once a year for bacteria and nitrates and every 5 years for arsenic, fluoride, uranium, radon, lead, and manganese.

If you have never tested your well water, we recommend doing a comprehensive or standard water test. Other times to test your well include:

If you are expecting a baby

Your water changes in smell, taste, and color

Your well runs dry and comes back

When buying a new home

After installing a water treatment system or replacing parts of your treatment system

After any work is done on your well

Get our brochure to learn more about well water testing

Common Well Water Contaminants and Problems

Arsenic

Fluoride

Lead

Manganese

Radon

Uranium

Corrosive Water External site disclaimer (Penn State Cooperative Extension)

How to disinfect or shock your well to remove bacteria (Maine Health and Environmental Testing Laboratory)

How to disinfect or shock your well to remove bacteria (Maine Drinking Water Program)

If you think your well has been contaminated by a sand/salt pile External site disclaimer

If your well has been flooded

Fixing Well Water Problems

Help paying for arsenic treatment External site disclaimer

Choosing a Radon Treatment Company

To make sure a treatment system is certified to remove a contaminant


Water Testing

Residential Home Owners

Unlike public water systems, which are regulated by the U.S. Environmental Protection Agency (EPA), private water supplies, like cisterns, wells and springs, are the responsibility of the homeowner and should be tested periodically to be certain they are safe for drinking.

Commercial Water Testing

Many businesses are required by the state to have their water tested routinely. Guthrie LEAP Testing Service is accredited for a variety of potable and non-potable analytes.

Legionnaires’ disease is caused by a type of bacteria called Legionella. Legionella bacteria are found in water sources including rivers, ponds, decorative fountains, cooling towers, hot and cold water systems and spas. Routine testing for Legionella pneumophila has been shown to reduce the risk of outbreaks. Legiolert is a 7-day culture test for Legionella.


Drinking water quality

Drinking water quality is an important public health issue

Drinking water quality is an important public health issue, so state and local officials closely monitor for contaminants and work together to protect water quality. Drinking water can be contaminated by man-made chemicals or by natural sources, like heavy metals in rock and soil. Natural waters contain impurities. Most impurities are harmless. However, drinking water that has certain levels of micro-organisms, minerals, man-made chemicals, or naturally-occurring pollutants can be harmful to your health.

Systems must meet Safe Drinking Water Act standards

MDH published Drinking Water Annual Reports provide summaries of water sampling and monitoring results. Local water suppliers also publish their own annual water quality reports (Consumer Confidence Reports) and distribute them to their customers. These may be obtained by request from local water utilities or through MDH’s Search for your Consumer Confidence Report (CCR).

has a vast amount of aging infrastructure. To continue to supply safe drinking water, communities will need to replace this infrastructure over the next few decades. For more information, visit the State Auditor’s  Infrastructure Stress Transparency Tool Version 2.0, a series of interactive maps that visualize data

Climate change impacts should be considered in all drinking water planning and operations. The MDH Climate & Health Program is working to increase awareness of the public health impacts of climate changes to our water quality and quantity.

People with private wells should get them tested

About twenty percent rely on private, household wells as their source of drinking water in their homes. While community water systems are tested regularly for a variety of contaminants, only newly-constructed private wells are required to be tested for contaminants
 

Well Water Testing

WATER BACTERIOLOGY TESTING FOR TOTAL COLIFORM/E. COLI

The Laboratory performs testing for Total Coliform/E. coli in drinking water for public water systems and private individuals with well water systems. The laboratory is accredited and certified to perform both presence/absence and enumeration testing.

FEES

Total Coliform/E. coli – Presence/Absence Test:

$16.00/sample

E.coli Enumeration Test:

$20.00/sample

AVAILABILITY

Water Testing is performed Monday through Thursday. Samples must be received prior to 3:00 p.m. on those days to insure enough time for sample processing and testing before the laboratory closes at 5:00 p.m. Testing is not performed on Fridays because the test takes 24 hours and the laboratory is closed on weekends.

FREE COLLECTION BOTTLES

The laboratory provides free sterile and buffered collection bottles for the collection of samples, and these are the only acceptable containers. Home-sterilized containers are not acceptable, as we cannot guarantee sterility as well as they do not contain a special buffer that assists in bacteria recovery. For this reason, only approved sample containers will be accepted. If you need them, please stop by our laboratory and pick them up for free.

SPECIAL FEES

There are special fees for special samples or samples that required repeated manipulations, extra work, or overtime to analyze. These fees will apply only to special or specific samples and should not normally be incurred when ordering Total or Fecal Coliform tests. If there is a special fee for your sample, you will be informed of this when you bring your sample to us for analysis.
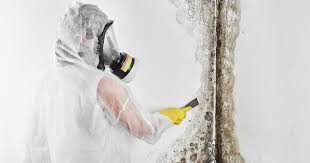

Toxic Black Mold Remediation Tips And Tricks From The Pros

How to Get Rid of Black Mold Naturally

Black mold can be dangerous to your health, mainly causing respiratory issues. But in severe cases and for people with pre-existing health conditions, black mold can lead to pneumonia. When you suspect a mold invasion, you might want to invest in a mold testing kit to see what type of mold spores you’re working with, and call in an expert to help with removal. But in the short-term, here are some natural home remedies (made with things you likely already have on-hand) that will help eradicate mold.

The Tea Tree Oil Solution

Tea tree oil is often used to keep spiders away, but it’s also one of the safer options for getting rid of black mold. It’s a natural fungicide that can work as a cleaning product, and it has the strength to prevent mold spores from coming back.

Grapefruit Seed Extract

Grapefruit seed extract is great to have on hand for various healthcare remedies and also cleaning solutions and potions. What makes it good at battling black mold? Its main compounds are polyphenols, known as limonoids, and naringenin, which help when killing bacteria in laundry, cleaning carpet spills (that could lead to mold growth!), and for disinfecting and sterilizing spaces. When the extract is used to fight black mold, the acids continue penetrating growth and prevent mold spores from returning.

Lemon Juice

Although this might not be the strongest weapon against black mold, it’s probably something you have in the kitchen. It’s also totally natural, and who doesn’t like the smell of freshly squeezed lemons? It will definitely smell better than the mildew/mold growing in your shower—but then again, what doesn’t?

Baking Soda

Baking soda is one of the greats. It’s a safe substance to have around your kids and pets, and it’s also effective at preventing mold and absorbing mildew odors.

Vinegar

White distilled vinegar is an affordable, natural solution to removing black mold. Its antibacterial acidic characteristics are exactly what you need to get the job done. Pour the undiluted vinegar into a spray bottle to apply to the area, or just go for it and pour that vinegar right onto the mold stains. Use a disposable towel and wipe away the mold from the area. If that doesn’t work, grab an old toothbrush and go to town on the problem zone. Allow time for this to dry, and then use a damp towel to wipe the area clean one more time.


Easy Ways to Control Your Mold Allergy

The difficulty in finding and identifying mold makes minimizing your exposure to mold spores tricky. But it is important: by minimizing your exposure, you can significantly diminish your symptoms. In fact, many people find that they can reduce or even eliminate their reliance on medication by taking the following steps to remove the mold from their home. The steps are listed below in approximate order of importance. The first two are the easiest and cheapest and are worth trying first.

Use a mold remover to kill visible mold. While mold can occasionally be hard to find, it is often visible to the naked eye. If you can see it, you can get rid of it. A mold removing spray cleaner will easily eliminate the mold.

Follow up with a mold preventer to assure mold does not grow back. Anywhere that mold grew once is probably a place that is conducive to mold growth. After using a mold remover, immediately follow up with a mold preventer to make sure the area stays mold free. Check it periodically, and reapply the mold preventer every once in a while.

Run a HEPA air purifier to capture mold spores that have become airborne. Sometimes it is just not possible to find and eliminate all of the mold in a house with a mold remover. If you have removed all visible mold and your allergies remain bothersome, a HEPA air purifier can be an effective solution. Place the air purifier in the room or rooms where you believe the mold is growing. It will capture 99.9% of all the airborne mold which passes through its filters, both improving the air quality in that room and preventing the mold spores from circulating throughout the rest of the home.

Use a dehumidifier to keep the relative indoor humidity below 50%. Dehumidifiers make an environment inhospitable for mold growth. Mold thrives in moist, humid areas. Eliminating excess moisture can solve a mold problem. If you think you know which room is the source of the mold problem, place the dehumidifier in that room. If you are not sure where the mold is coming from, you can use a whole house humidifier which will link to your central air system.

Install a quality disposable filter in your central air system. A good disposable filter is an effective back-up to an air purifier. It is also the best line of defense against mold spores which enter the home from the outside. Airborne mold spores will eventually circulate through the central air system and can be captured using a highly efficient disposable filter. Because all central air systems require a disposable filter, it makes sense to choose one that is effective at capturing mold spores and other allergens.

Use a filter on your window screens and window air conditioner. Mold can enter the home through open windows. If you cannot identify any likely source of indoor mold, you may be having a reaction to outdoor mold which has entered your home through open windows. To combat the entry of outdoor mold, you can use a filter that captures mold spores so they will not enter through an open window. Also, people who use a window air conditioner can use a filter specially designed to prevent the air conditioner from sucking the mold spores into the home.


Molds require two factors to grow indoors:

  • Moisture! This comes from condensation, leaks in pipes or foundations, or any ongoing source of water.
  • A Food Source: Somewhere to grow that provides required nutrients.

Molds particularly like to grow on wallboard, damp wood, fabrics, leather, and paper products. They can also grow on concrete or the dirt on windows or window frames. Food products, particularly vegetables, fruits, and breads provide a good place, also. It spreads by producing spores that can become airborne when disturbed directly or by air currents. These spores end up on surfaces where they grow.


HOW TO STOP MOLD GROWTH ON WALLS

  • Prepare the affected walls with the usual white, black or bluish patches of mold on the walls. If it has spread to adjacent areas, such as the carpet or other items, remove these from the walls and salvage whatever you can.
  • Scrub as hard as you can. Use a mixture of one part bleach and three parts water and combine it with some hard scrubbing using a heavy-duty sponge or scrub brush. Let the solution soak in for a few minutes. In even worse cases, you may need to use this bleach mixture with a formulated mold remover. Make sure to wear rubber gloves and a respirator mask for protection and turn on the ventilation fan.
  • Dry the walls completely.


Effects of Mold in the Home

Everyone is exposed to mold spores, but they affect each person differently. Those with allergies can suffer effects year-round. These spores can trigger reactions like allergic rhinitis or asthma. They can produce volatile organic compounds, or VOC’s. Besides the unappealing look and smell, mold can trigger allergic reactions such as respiratory irritation, watery eyes, coughing, and headaches. Coughing, wheezing, runny nose or irritated eyes and throat are all signs of a mold allergy. These can also trigger an asthma attack, with symptoms like wheezing, coughing and shortness of breath. Some strains may also be toxic! This is why we need to address an issue promptly. If you’re wondering how to get rid of mold, you’ve come to the right place!

Why Your Home Should Undergo Annual Mold Inspections

A BEGINNERS GUIDE TO HIRING A MOLD INSPECTOR

Before moving into a new home, it is essential to check for mold, especially in areas where there are damp walls, floors, and ceilings. Its presence does not only affect your home’s integrity but can also affect your health if not removed immediately. Prolonged exposure to mold contamination can lead to flu and cold symptoms like watery eyes, fatigue, dizziness, headaches, and even upper respiratory congestion among other issues.

As more people grow aware of the impacts of mold infestations on their health, and the health of their loved ones, the more essential home inspections become for home buyers and new parents. Unfortunately, in an attempt to get rid of their mold quickly, many people hire an inspector without qualifying them

Look for professionals: You will need to start by searching the internet for expert mold inspectors near you. Only a specialist will have the knowledge and equipment to find the mold and have suggestions on what and how to deal with it. So, read their websites to find information related to these aspects.

Shortlist the ones with the best reviews: Try looking for inspectors you’ve listed on rating sites like Angie’s List or Home Advisor and check their ratings and reviews. You can also do a Google search for review and rating websites to see what pops up.

Look for signs of professionalism: A professional mold inspector should be just that, a professional. Do they arrive wearing a uniform or with a logo on their clothing or vehicle? Do they have the basic requirements like a moisture meter, bright flashlight, air sampler, tape lift, and swabs for sampling? Can they provide proof of training? Do they have any professional association memberships


Testing for Mold Tips

Testing for Mold Litigation

For the strongest case possible, you’ll need to know the species of mold you are dealing with. It is in your best interest to have a disinterested, 3rd party to take the test for you.  It is also recommend to undergo multiple tests in order to support your case. If water damage was a problem, you will also want to test for environmental bacteria, as this has the potential to make you very ill.

Testing for Mold Post Remediation

Once you have determined that your environment has mold contamination (testing for mold has confirmed the presence of mold infestation), you must have the structure “professionally remediated” for mold. Once remediated, you’ll need to be sure the job was done correctly and the mold levels are deemed safe. This type of testing for mold is known as “Post Remediation Clearance Testing”, this assures you the job was done correctly and the structure is now safe to inhabit.

Testing for Mold Health Reasons

Is your environment making you sick? You will need medical testing in conjunction with your environmental testing for a complete analysis.

Testing for Mold Peace of Mind

Testing for mold and getting clear and clean results is the peace of mind every person wants to get.  Whether it’s in your home, apartment, school or place of work, testing for mold can give you that peace of mind.

Water Damage

Moisture is generally the cause of mold growth in a structure. When inspecting a building the first step in figuring out how the mold contamination began is finding the water intrusion. We recommend testing anywhere there is visible water damage in order to identify the source of your mold problem


How to Perform Your Own Mold Inspection & Mold Cleanup

The steps in this document will be sufficient for many building owners who want to do their own mold investigation, mold testing, mold cleanup, and mold prevention in their home or office.

However do-it-yourselfers should pay close attention to what can go wrong. If you haven’t already read HIRE A PROFESSIONAL? you should do so now

We encourage healthy, not-at-risk people to handle small mold problems themselves. You don’t need to hire an expert to clean up moldy bath tiles or a square foot of moldy drywall. But if you are proceeding on your own, be alert for the discovery that the extent of the problem is large enough that you should stop and bring in a professional.

Find the Mold: Examine living/working conditions to find evidence of any mold or to determine the actual extent of mold problem in the building. Our website includes detailed articles on finding and recognizing mold both on visible surfaces and by invasive methods such as cutting small openings at areas where there is high risk of a hidden mold reservoir (such as where leaks into a wall or ceiling have occurred

Clean-up the Mold: remove or clean up problem mold reservoirs. But don’t be fooled into spending an outlandish sum on removing a “cosmetic” mold. Later below you’ll read about stuff that is not mold or is only a cosmetic mold. We provide detailed articles on good procedures to clean up indoor mold. Don’t forget that the key word in mold remediation is “remove” – we need to clean off moldy surfaces that can be cleaned and dispose of moldy materials (such as drywall and insulation) that cannot be cleaned


Mold Testing by Inspector

I started my business in 1994, before mold became known as a public health issue, so I had about 7 years experience before the mold industry started to get organized.

To be credentialed, I took the mold inspector training in the early 2000s. At the class I attended, the students were essentially taught to be lab technicians. We were taught to do a visual inspection, and if we saw anything that looked like it might be mold, to take a swab or tape sample and forward it to the lab. We were also to take a spore trap test on each floor of the house, probably with the exception of the attic, plus the outside. That’s it – 4 or 5 samples from the average house (whereas I’m taking 40-60 on my inspections, usually without any lab fees but including photo-documentation of mold growth).

Another problem is that there can be high levels of mold that are not visible to the naked eye, so someone who goes just by what is visible may miss a lot of mold.

Therefore, if you plan to have mold testing by an inspector, be prepared that mold likely may be missed. You may want to pick up the slack with your own do-it-yourself testing before the inspector arrives. You may need to guide the inspector to where to sample (if you should need lab confirmation for legal purposes or if you want to be sure that remediation doesn’t miss some area of mold growth).

Types of air testing

Although I find tape-sampling with a microscope invaluable for finding invisible mold, I almost always take air samples, too. When having mold testing by an inspector, the usual type of air sampling done is called “spore trap testing.” Spores are trapped on a sticky surface and the test kit is forwarded to a lab for counting. Some inspectors, myself included, prefer culture plate sampling, because it is better for diagnostic purposes. With culture plate, you can see the type of mold that grows out from trapped spores.

(Industry guidelines call for one sample in the basement, one on each level of the house, and an outside sample. Sometimes we do that. Sometimes the prospective purchaser says that they won’t be negotiating but just want a basement sample done for their own information. One sample costs a lot less than four samples. But if legal use could be made of a basement sample, then have all four samples done, or you will have no reference point for understanding the basement sample. Your inspector could be challenged as not knowing what he is doing, for that matter.)


Mountainside Mold Remediation

How do you choose the best Mountainside Mold Remediation company? Jun’s Mold Remediation performs mold inspection testing to find the mold. When there is mold in your home and you want to get rid of it quickly, choosing the best mold remediation company is very important. Water damage can lead to mold problems in your home. Searching for a qualified remediator that understands the potential danger of mold in a home is critical. Here are a few tips on finding a good mold remediation company

Mold inspectors use many different tools to help them diagnose and verify what they find in the home. A professional mold removal takes samples of the air and physical locations of the home to check if there is presence of mold. Sample are sent to the labs to be analyzed and report what findings there are

Searching for the best mold remediation it is best to check for references and reviews. A company that shows consistency will show up on a number of good reviews in different sites. Review the contract and agreement made with the professional, knowing what information you will be given about the test and results. A good report supplied by the professional will have findings of mold, photos supporting any findings. An action plan for dealing with the problems and good maintenance tips will also be provided in the report.

Mold in a home means that moisture or humidity is or has been present. Water that has been present and not dried up will produce mold. If there is some discoloration of drywall paper or flooring there could be a mold issue. Mold is not only black. A mold situation at times has a musty odor. Walking in a home with a mold issue can be sometimes easily detected by the odor in the air. Even if mold is not visible and has no odor, mold is inspected and found in the home by having a proper mold remediation.

Usually when residents of a home are experiencing congestion, allergy symptoms, headaches or breathing issues it is an indication of unhealthy air quality in the home and it must be inspected right away.

Tips To Find The Best Water Testing

Public Water Systems

What type of health issues can be related to water quality?

The presence of certain contaminants in our water can lead to health issues, including gastrointestinal illness, reproductive problems, and neurological disorders. Infants, young children, pregnant women, the elderly, and immunocompromised persons may be especially at risk for becoming ill after drinking contaminated water. For example, elevated levels of lead can cause serious health problems, especially for pregnant women and young children. Federal law requires that systems reduce certain contaminants to set levels, in order to protect human health.

How do contaminants (germs and chemicals) get into my drinking water?

There can be many sources of contamination of our water systems. Here is a list of the most common sources of contaminants:

  • Naturally occurring chemicals and minerals (for example, arsenic, radon, uranium)
  • Local land use practices (fertilizers, pesticides, livestock, concentrated animal feeding operations)
  • Manufacturing processes
  • Sewer overflows
  • Malfunctioning wastewater treatment systems (for example, nearby septic systems)

Many contaminants that pose known human health risks are regulated by the United States Environmental Protection Agency (EPA). EPA makes sure that water meets certain standards, so you can be sure that high levels of contaminants are not in your water.


The Complete Guide to Pool Water Testing

Pool Water Testing is Essential to Pool Health

If you don’t test your pool water, how do you know what the chemical levels are? Or what undesirable substances are in it? Or how much and what chemicals to put into the water to create a clean and safe swimming environment?The answer is, you don’t. You absolutely must learn how to test pool water, and then do so on a regular basis. In fact, out of all the pool maintenance tasks you’ll perform over the life of your pool, testing the water is the one thing you’ll do more than anything else.

How to Test Pool Water Accurately

It doesn’t seem like it should be a complicated endeavor, and it’s really not. You even have a few testing options.

How to Take a Proper Pool Water Sample

The most important factors here are where you take the sample from, and how you do it. If possible, take the sample from the absolute middle of your pool.

How to Use Test Strips

In addition to being super quick and easy to use, test strips can also sometimes be more accurate than liquid test kits because human error can make it difficult to match up the colors using the chemical drops.


Well Water Testing (Private Drinking Water)

About Well Water Testing

Your well water can affect the health of everyone who consumes it. At PHO, we test for the indicators of bacterial contamination:

Coliforms: These bacteria are often found in animal waste, sewage, as well as soil and vegetation. If they are in your drinking water, surface water may be entering your well.

coli (Escherichia coli). These bacteria are normally found only in the digestive systems of people and animals. If they are in your drinking water, it usually means that animal or human waste is entering your well from a nearby source.

We do not test for other contaminants such as chemicals. This means that even if your results show there is no bacterial contamination in your drinking water, it still may be unsafe to drink.

For all other environmental testing, including testing for chemical contaminants, please consult with your local public health unit.

If you are an owner or operator of a large drinking water system under Ontario regulation 170/03 and need more information, contact the Ministry of Environment, Conservation and Parks. For more information about small drinking water systems regulated under Ontario regulation 319/08, contact your local public health unit


Standard drinking water test

What should I do before I take a water sample?

Before you take a sample, call the laboratories listed in Table 2 to obtain sampling bottles and information on the correct sampling procedure. Please note that your sample will not provide you with accurate information unless the:

  • correct sample bottles are used
  • correct volume is taken
  • sample is stored at the required temperature
  • sample is transported to and arrives at the laboratory in the correct time
  • correct procedure is used to take the sample.

What do the results mean?

The Department of Health is able to interpret laboratory results and provide you with general advice on how to make your water safe to drink. Microbiological and chemical laboratories may also be able to assist you with additional technical advice. However, they are not in a position to provide you with health related advice.

Will the standard drinking water test, test for all contaminants?

No. The catchment or source of your drinking water can affect the water quality in many ways. Water can dissolve chemicals and transport microbiological contaminants while it travels through or across the catchment area. It is important that you identify the hazards that occur in or on the catchment area before you test the water.


How to test for lead in your home water supply

How lead enters your home’s water supply

Just like in Flint, lead can enter your home when lead plumbing materials, which can include faucets, pipes, fittings and the solder that holds them all together, become corroded and begin to release lead into the water. Corrosion is most likely to happen when water has a high acid or low mineral content and sits inside pipes for several hours, says the EPA.

Lead is everywhere

Finding out about lead in your water is only one part of the solution. Lead enters our bodies from many common contaminated sources other than drinking water, such as dust, soil and air. In fact, the EPA says the main source of lead exposure in the United States comes from inhaling dust or eating particles contaminated by paint chips. That’s because lead was a common additive in house paint, gasoline and many other materials for years before its toxicity was known.